key - invoice::1
{ "BillTo": "Lynn Hess", "InvoiceDate": "2018-01-15 00:00:00.000", "InvoiceNum": "ABC123", "ShipTo": "Herman Trisler, 4189 Oak Drive" }

key - invoiceitem::1811cfcc-05b6-4ace-a52a-be3aad24dc52
{ "InvoiceId": "1", "Price": "1000.00", "Product": "Brake Pad", "Quantity": "24" }

key - invoiceitem::29109f4a-761f-49a6-9b0d-f448627d7148
{ "InvoiceId": "1", "Price": "10.00", "Product": "Steering Wheel", "Quantity": "5" }

key - invoiceitem::bf9d3256-9c8a-4378-877d-2a563b163d45
{ "InvoiceId": "1", "Price": "20.00", "Product": "Tire", "Quantity": "2" }That's right, Cross Cutting Concerns is back for season 3! I know I always say this, but I've got a month full of amazing guests!
I've also got: new original music by JoeFerg (you've gotta hear this!). A new gameshow segment! And much more!
Subscribe now!
Here's what's coming in February:
- Rachel Andrew(!) on CSS Web Grid
- Correl Roush returning to talk Elm
- Tim Wingfield on API design
- Bill Sempf with a very special, jumbo episode discussing information security through the lens of one of my favorite films: Sneakers
Subscribe now with your podcatcher of choice!
Want to be on the next episode? You can! All you need is the willingness to talk about something technical.
This is a repost that originally appeared on the Couchbase Blog: JSON Data Modeling for RDBMS Users.
JSON data modeling is a vital part of using a document database like Couchbase. Beyond understanding the basics of JSON, there are two key approaches to modeling relationships between data that will be covered in this blog post.
The examples in this post will build on the invoices example that I showed in CSV tooling for migrating to Couchbase from Relational.
Imported Data Refresher
In the previous example, I started with two tables from a relational database: Invoices and InvoicesItems. Each invoice item belongs to an invoice, which is done with a foreign key in a relational database.
I did a very straightforward (naive) import of this data into Couchbase. Each row became a document in a "staging" bucket.
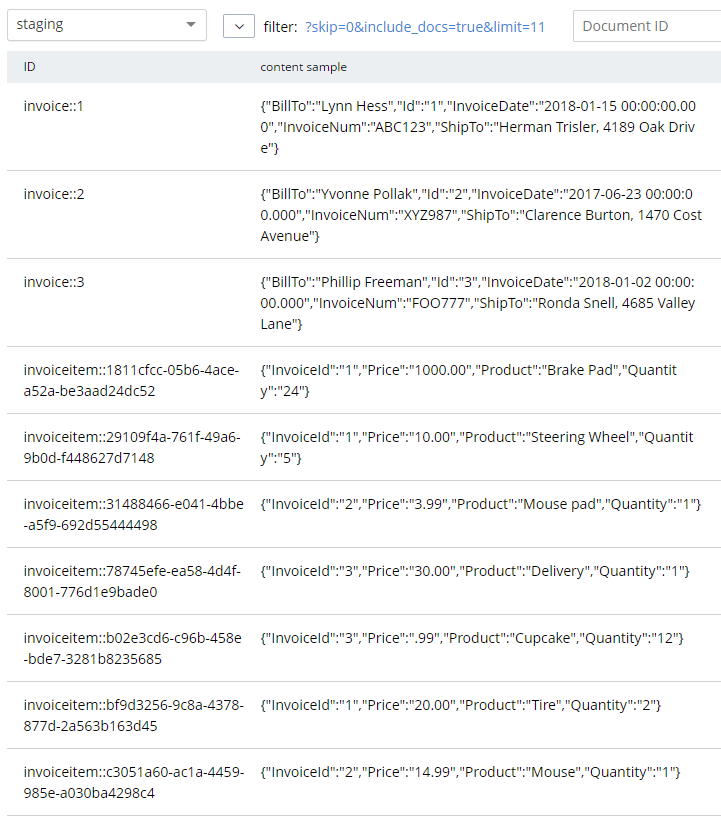
Next, we must decide if that JSON data modeling design is appropriate or not (I don’t think it is, as if the bucket being called "staging" didn’t already give that away).
Two Approaches to JSON data modeling of relationships
With a relational database, there is really only one approach: normalize your data. This means separate tables with foreign keys linking the data together.
With a document database, there are two approaches. You can keep the data normalized or you can denormalize data by nesting it into its parent document.
Normalized (separate documents)
An example of the end state of the normalized approach represents a single invoice spread over multiple documents:
This lines up with the direct CSV import. The InvoiceId field in each invoiceitem document is similar to the idea of a foreign key, but note that Couchbase (and distributed document databases in general) do not enforce this relationship in the same way that relational databases do. This is a trade-off made to satisfy the flexibility, scalability, and performance needs of a distributed system.
Note that in this example, the "child" documents point to the parent via InvoiceId. But it could also be the other way around: the "parent" document could contain an array of the keys of each "child" document.
Denormalized (nested)
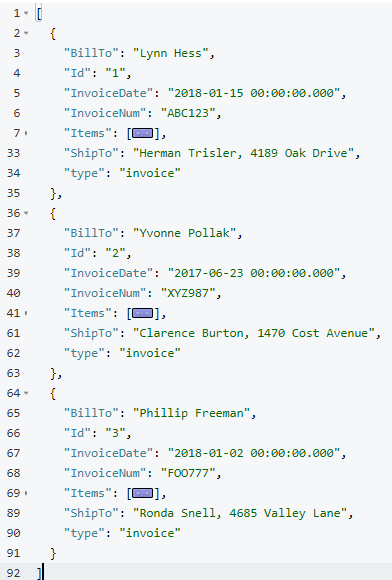
The end state of the nested approach would involve just a single document to represent an invoice.
key - invoice::1
{
  "BillTo": "Lynn Hess",
  "InvoiceDate": "2018-01-15 00:00:00.000",
  "InvoiceNum": "ABC123",
  "ShipTo": "Herman Trisler, 4189 Oak Drive",
  "Items": [
    { "Price": "1000.00", "Product": "Brake Pad", "Quantity": "24" },
    { "Price": "10.00", "Product": "Steering Wheel", "Quantity": "5" },
    { "Price": "20.00", "Product": "Tire", "Quantity": "2" }
  ]
}
Note that "InvoiceId" is no longer present in the objects in the Items array. This data is no longer foreign—it’s now domestic—so that field is not necessary anymore.
JSON Data Modeling Rules of Thumb
You may already be thinking that the second option is a natural fit in this case. An invoice in this system is a natural aggregate-root. However, it is not always straightforward and obvious when and how to choose between these two approaches in your application.
Here are some rules of thumb for when to choose each model:
| If … | Then consider… |
|---|---|
|
Relationship is 1-to-1 or 1-to-many |
Nested objects |
|
Relationship is many-to-1 or many-to-many |
Separate documents |
|
Data reads are mostly parent fields |
Separate document |
|
Data reads are mostly parent + child fields |
Nested objects |
|
Data reads are mostly parent or child (not both) |
Separate documents |
|
Data writes are mostly parent and child (both) |
Nested objects |
Modeling example
To explore this deeper, let’s make some assumptions about the invoice system we’re building.
-
A user usually views the entire invoice (including the invoice items)
-
When a user creates an invoice (or makes changes), they are updating both the "root" fields and the "items" together
-
There are some queries (but not many) in the system that only care about the invoice root data and ignore the "items" fields
Then, based on that knowledge, we know that:
-
The relationship is 1-to-many (a single invoice has many items)
-
Data reads are mostly parent + child fields together
Therefore, "nested objects" seems like the right design.
Please remember that these are not hard and fast rules that will always apply. They are simply guidelines to help you get started. The only "best practice" is to use your own knowledge and experience.
Transforming staging data with N1QL
Now that we’ve done some JSON Data Modeling exercises, it’s time to transform the data in the staging bucket from separate documents that came directly from the relational database to the nested object design.
There are many approaches to this, but I’m going to keep it very simple and use Couchbase’s powerful N1QL language to run SQL queries on JSON data.
Preparing the data
First, create a "operation" bucket. I’m going to transform data and move it to from the "staging" bucket (containing the direct CSV import) to the "operation" bucket.
Next, I’m going to mark the 'root' documents with a "type" field. This is a way to mark documents as being of a certain type, and will come in handy later.
UPDATE staging
SET type = 'invoice'
WHERE InvoiceNum IS NOT MISSING;
I know that the root documents have a field called "InvoiceNum" and that the items do not have this field. So this is a safe way to differentiate.
Next, I need to modify the items. They previously had a foreign key that was just a number. Now those values should be updated to point to the new document key.
UPDATE staging s
SET s.InvoiceId = 'invoice::' || s.InvoiceId;
This is just prepending "invoice::" to the value. Note that the root documents don’t have an InvoiceId field, so they will be unaffected by this query.
After this, I need to create an index on that field.
Preparing an index
CREATE INDEX ix_invoiceid ON staging(InvoiceId);This index will be necessary for the transformational join coming up next.
Now, before making this data operational, let’s run a SELECT to get a preview and make sure the data is going to join together how we expect. Use N1QL’s NEST operation:
SELECT i.*, t AS Items
FROM staging AS i
NEST staging AS t ON KEY t.InvoiceId FOR i
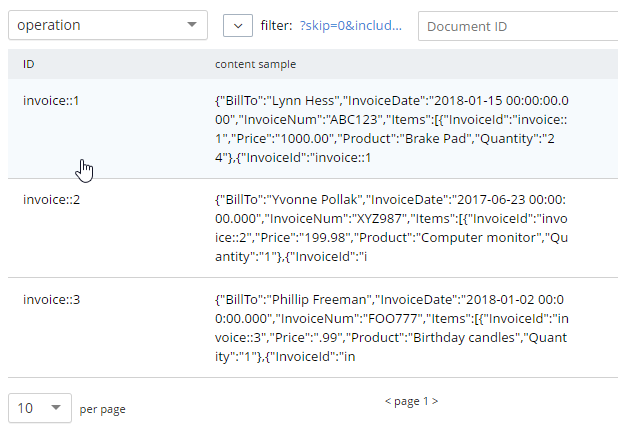
WHERE i.type = 'invoice';The result of this query should be three total root invoice documents.
The invoice items should now be nested into an "Items" array within their parent invoice (I collapsed them in the above screenshot for the sake of brevity).
Moving the data out of staging
Once you’ve verified this looks correct, the data can be moved over to the "operation" bucket using an INSERT command, which will just be a slight variation on the above SELECT command.
INSERT INTO operation (KEY k, VALUE v)
SELECT META(i).id AS k, { i.BillTo, i.InvoiceDate, i.InvoiceNum, "Items": t } AS v
FROM staging i
NEST staging t ON KEY t.InvoiceId FOR i
where i.type = 'invoice';
If you’re new to N1QL, there’s a couple things to point out here:
-
INSERTwill always useKEYandVALUE. You don’t list all the fields in this clause, like you would in a relational database. -
META(i).idis a way of accessing a document’s key -
The literal JSON syntax being SELECTed AS v is a way to specify which fields you want to move over. Wildcards could be used here.
-
NESTis a type of join that will nest the data into an array instead of at the root level. -
FOR ispecifies the left hand side of theON KEYjoin. This syntax is probably the most non-standard portion of N1QL, but the next major release of Couchbase Server will include "ANSI JOIN" functionality that will be a lot more natural to read and write.
After running this query, you should have 3 total documents in your 'operation' bucket representing 3 invoices.
You can delete/flush the staging bucket since it now contains stale data. Or you can keep it around for more experimentation.
Summary
Migrating data straight over to Couchbase Server can be as easy as importing via CSV and transforming with a few lines of N1QL. Doing the actual modeling and making decisions requires the most time and thought. Once you decide how to model, N1QL gives you the flexibility to transform from flat, scattered relational data into an aggregate-oriented document model.
More resources:
-
Using Hackolade to collaborate on JSON data modeling.
-
Part of the SQL Server series discusses the same type of JSON data modeling decisions
-
How Couchbase Beats Oracle, if you’re considering moving some of your data away from Oracle
-
Moving from Relational to NoSQL: How to Get Started white paper.
Feel free to contact me if you have any questions or need help. I’m @mgroves on Twitter. You can also ask questions on the Couchbase Forums. There are N1QL experts there who are very responsive and can help you write the N1QL to accommodate your JSON data modeling.
This is a repost that originally appeared on the Couchbase Blog: CSV tooling for migrating to Couchbase from Relational.
CSV (Comma-seperated values) is a file format that can be exported from a relational database (like Oracle or SQL Server). It can then be imported into Couchbase Server with the cbimport utility.
Note: cbimport comes with Couchbase Enterprise Edition. For Couchbase Community Edition, you can use the more limited cbtransfer tool or go with cbdocloader if JSON is an option.
A straight relational→CSV→Couchbase ETL probably isn’t going to be the complete solution for data migration. In a later post, I’ll write about data modeling decisions that you’ll have to consider. But it’s a starting point: consider this data as "staged".
Note: for this post, I’m using SQL Server and a Couchbase Server cluster, both installed locally. The steps will be similar for SQL Server, Oracle, MySQL, PostgreSQL, etc.
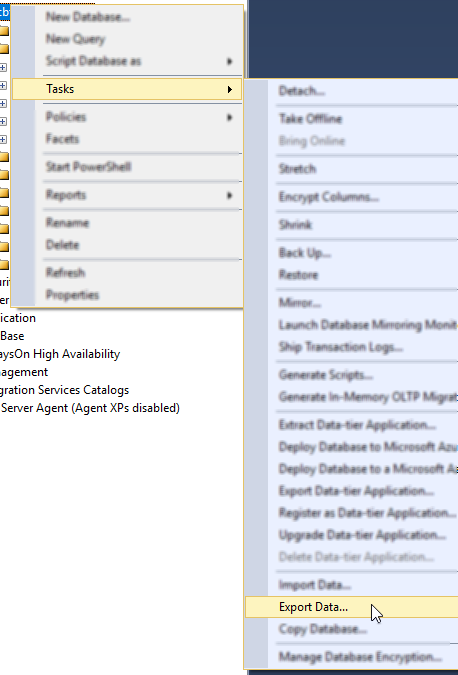
Export to CSV
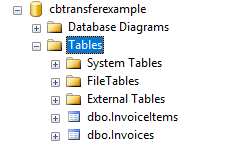
The first thing you need to do is export to CSV. I have a relational database with two tables: Invoices and InvoiceItems.
I’m going to export the data from these two tables into two CSV files. With SQL Server Management Studio, this can be done a number of different ways. You can use sqlcmd or bcp at the command line. Or you can use Powershell’s Invoke-Sqlcmd and pipe it through Export-Csv. You can also use the SQL Server Management Studio UI.
Other relational databases will have command line utilities, UI tools, etc to export CSV.
Here is an example of a CSV export from a table called "Invoices":
Id,InvoiceNum,InvoiceDate,BillTo,ShipTo
1,ABC123,2018-01-15 00:00:00.000,Lynn Hess,"Herman Trisler, 4189 Oak Drive"
2,XYZ987,2017-06-23 00:00:00.000,Yvonne Pollak,"Clarence Burton, 1470 Cost Avenue"
3,FOO777,2018-01-02 00:00:00.000,Phillip Freeman,"Ronda Snell, 4685 Valley Lane"
Here’s an export from a related table called "InvoiceItems":
InvoiceId,Product,Quantity,Price
1,Tire,2,20.00
1,Steering Wheel,5,10.00
1,Engine Oil,10,15.00
1,Brake Pad,24,1000.00
2,Mouse pad,1,3.99
2,Mouse,1,14.99
2,Computer monitor,1,199.98
3,Cupcake,12,.99
3,Birthday candles,1,.99
3,Delivery,1,30.00
Load CSV into Couchbase
Let’s import these into a Couchbase bucket. I’ll assume you’ve already created an empty bucket named "staging".
First, let’s import invoices.csv.
Loading invoices
C:\Program Files\Couchbase\Server\bin\cbimport csv -c localhost -u Administrator -p password -b staging -d file://invoices.csv --generate-key invoice::%Id%Note: with Linux/Mac, instead of C:\Program Files\Couchbase\Server\bin, the path will be different.
Let’s break this down:
-
cbimport: This is the command line utility you’re using
-
csv: We’re importing from a CSV file. You can also import from JSON files.
-
-c localhost: The location of your Couchbase Server cluster.
-
-u Administrator -p password: Credentials for your cluster. Hopefully you have more secure credentials than this example!
-
-b staging: The name of the Couchbase bucket you want the data to end up in
-
--generate-key invoice::%Id% The template that will be used to create unique keys in Couchbase. Each line of the CSV will correspond to a single document. Each document needs a unique key. I decided to use the primary key (integer) with a prefix indicating that it’s an invoice document.
The end result of importing a 3 line file is 3 documents:
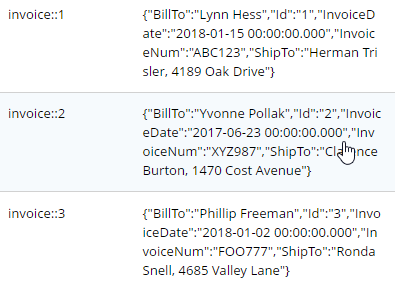
At this point, the staging bucket only contains invoice documents, so you may want to perform transformations now. I may do this in later modeling examples, but for now let’s move on to the next file.
Loading invoice items
C:\Program Files\Couchbase\Server\bin\cbimport csv -c localhost -u Administrator -p password -b staging -d file://invoice_items.csv --generate-key invoiceitem::#UUID#This is nearly identical to the last import. One difference is that it’s a new file (invoice_items.csv). But the most important difference is --generate—key. These records only contain foreign keys, but each document in Couchbase must have a unique key. Ultimately, we may decide to embed these records into their parent Invoice documents. But for now I decided to use UUID to generate unique keys for the records.
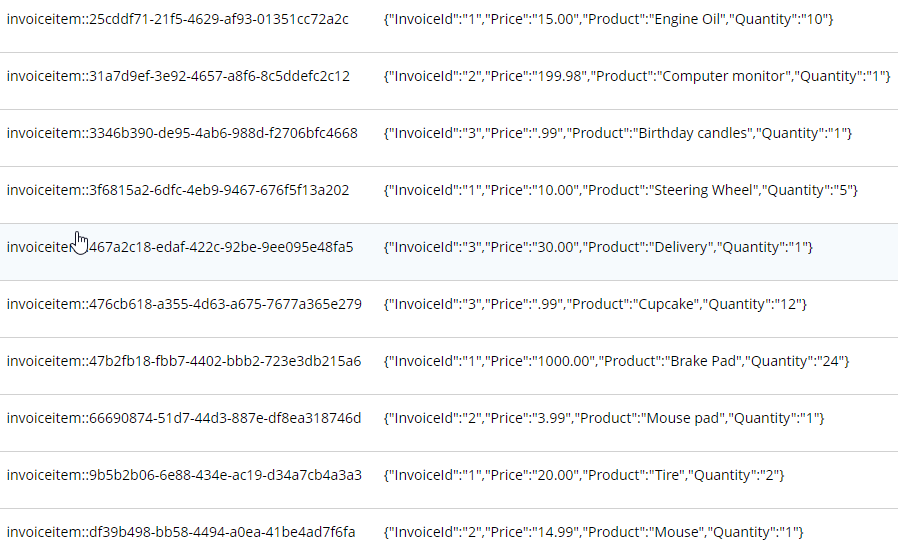
The end result of importing this 10 line file is 10 more documents:
What’s next?
Once you have a CSV file, it’s very easy to get data into Couchbase. However, this sort of direct translation is often not going to be enough on its own. I’ve explored some aspects of data modeling in a previous blog post on migrating from SQL Server, but I will revisit this Invoices example in a refresher blog post soon.
In the meantime, be sure to check out How Couchbase Beats Oracle for more information on why companies are replacing Oracle for certain use cases. And also take a look at the Moving from Relational to NoSQL: How to Get Started white paper.
If you have any questions or comments, please feel free to leave them here, contact me on Twitter @mgroves, or ask your question in the Couchbase Forums.
Cartridge cleaning is something that I need to do more of, now that I’m selling off most of my video game collection, one piece at a time.
I welcome your feedback, but here’s how I’m currently doing it for standard NES cartridges. The materials you need for cleaning should only set you back $20 (or less).
Open the cartridge
First, open the cartridge. The type of screws used in standard Nintendo cartridges are a little out of the ordinary. You will need a special "security bit". I have found that not all cartridges use this same screw, but most do. I got a new ratcheting screwdriver set as a gift, and one of the bits that came with it works perfectly. Here’s the screwdriver and bits that I've used for various screw types.

Your NES cartridge may have 3 or 5 screws. Be careful not to drop them after you unscrew them, as they are very tiny and easy to lose.
Carefully separate the two halves of the cartridge and bear in mind that there are two small latches at the top that clasp together.
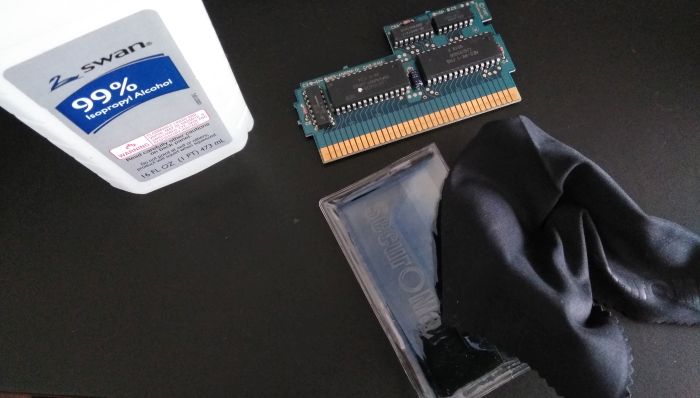
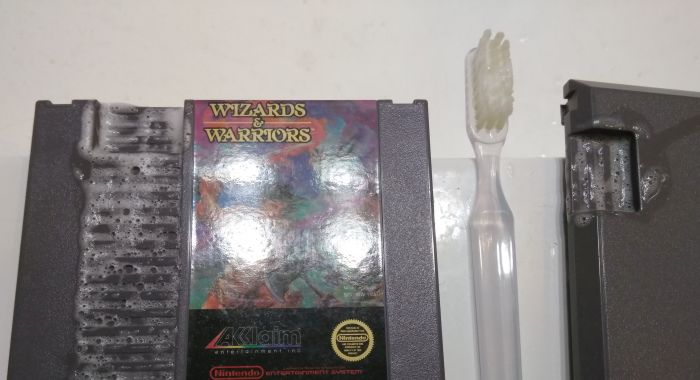
Inside the cartridge you should see a small circuit board and a lot of empty space. In this example, I used Wizards and Warriors.
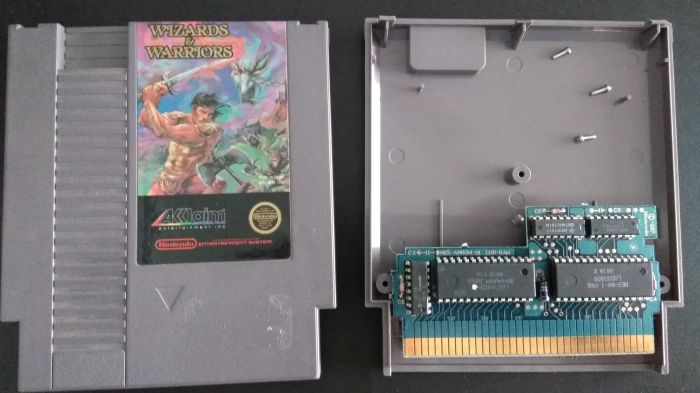
Note that the inside may vary. If you’re doing cartridge cleaning on older NES titles, it may just be a Famicom board with an adapter inside. You may see some cartridges that contain batteries. Make sure to be very careful when handling the board. You may want to ground yourself to avoid any static discharge.
Cartridge cleaning
The most important things to clean are the contacts that stick out the bottom.
Contacts
These are the gold/copper color strips that are the most exposed and actually plug into the console. To clean these, use isopropyl alcohol (I’m using 99%) and a lint-free cloth.
Note: most cartridges have a warning "DO NOT CLEAN WITH BENZENE, THINNER, ALCOHOL OR OTHER SUCH SOLVENTS." on the back. I suspect this warning is to a) get people to buy official Nintendo cleaning kits, and/or b) indemnify Nintendo if something goes wrong. Alcohol, especially alcohol that’s not very diluted, is perfectly fine for cleaning electrical contacts. You don’t have to take my word for it, check out here, here, and here for more information. I’ve also heard that certain types of erasers are good for cleaning these contacts. The key is make sure it’s absolutely dry before you plug in the cartridge.
First, put a very small amount of the alcohol on the contacts (you might want to use a dropper, a Q-tip, or just dip the cloth into the alcohol), and rub them with a cloth (make sure to get both sides).
You don’t need very much alcohol.
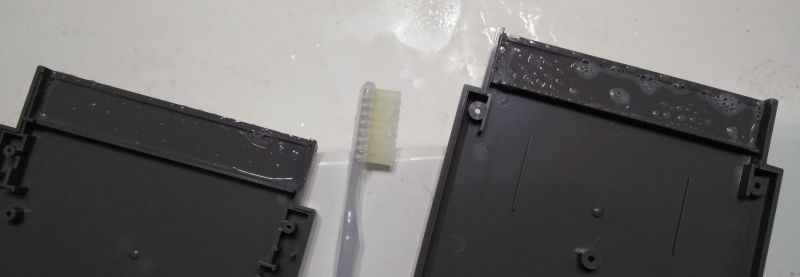
Plastic case
Next, while this is drying, you may want to perform cartridge cleaning on the rest of the exposed portion of the cartridge with soap and water. Use a toothbrush or other gentle cleaning brush to get all the corners. This part of the cartridge is usually fine if stored correctly. However, since it’s exposed, who knows what might have gotten in there over the years. Dust, spilled drinks, spit from people blowing into them, and so on.
Finally, you may want to clean up the outside of the cartridge for aesthetic reasons. The line of ridges can often build up dust and grime, so you can also use soap and water on that. Be careful not to get anything on the label.
Make sure to dry the soap and water with a cloth. I recommend not using a paper towel.
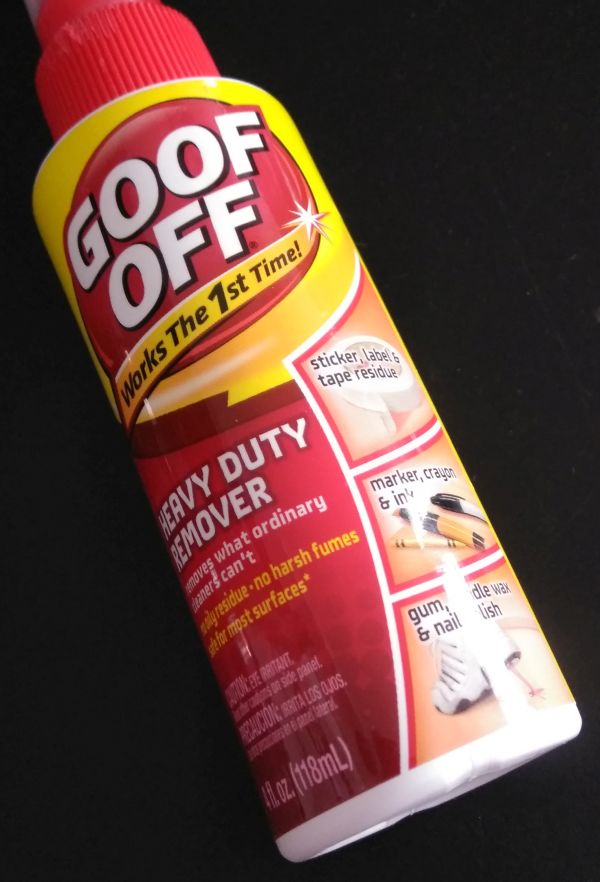
If there are any stickers or other residue on the outside of the cartridge, you can use something like Goof Off to remove it. Again, be very careful not to get this on the label.
Make sure everything is dry before putting it back together. I cannot overstate this. Do not mix moisture and electricity!
The circuit board should only fit one way back in the case.
All done!
The cartridge I used in this example was a fairly standard NES cartridge and was not in bad shape to begin with. If I run into any other interesting examples, I will write separate blog posts.
Cartridge cleaning, because cleanliness is next to… uh… something.
This is a repost that originally appeared on the Couchbase Blog: Test Drive: Trying Couchbase on Azure for Free.
Test Drive is an Azure feature that allows you to try out software in the cloud for free.
Previously, I wrote about how Getting started with Couchbase on Azure is easy and free. That post told you how to get started with $200 in Azure credit. With Test Drive, however, it’s even easier to get started, and you don’t have to use any of that $200 credit.
Test Drive on Azure Marketplace
The only thing you need before you start is a Microsoft account, which is free.
Start by going to the Couchbase Enterprise product page on Azure.
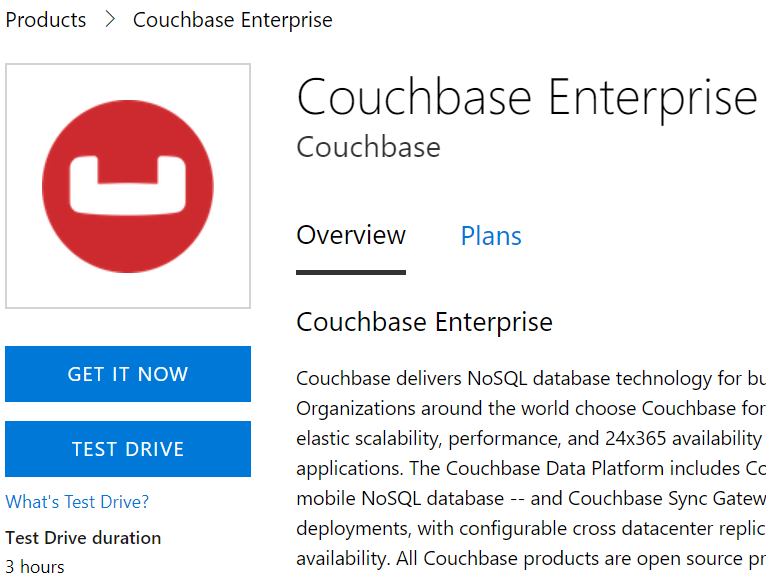
There’s a big "Test Drive" button. Simply click to get started.
Before you click to get started, notice that the Test Drive has a limited duration. You will get 3 hours to evaluate Couchbase Server.
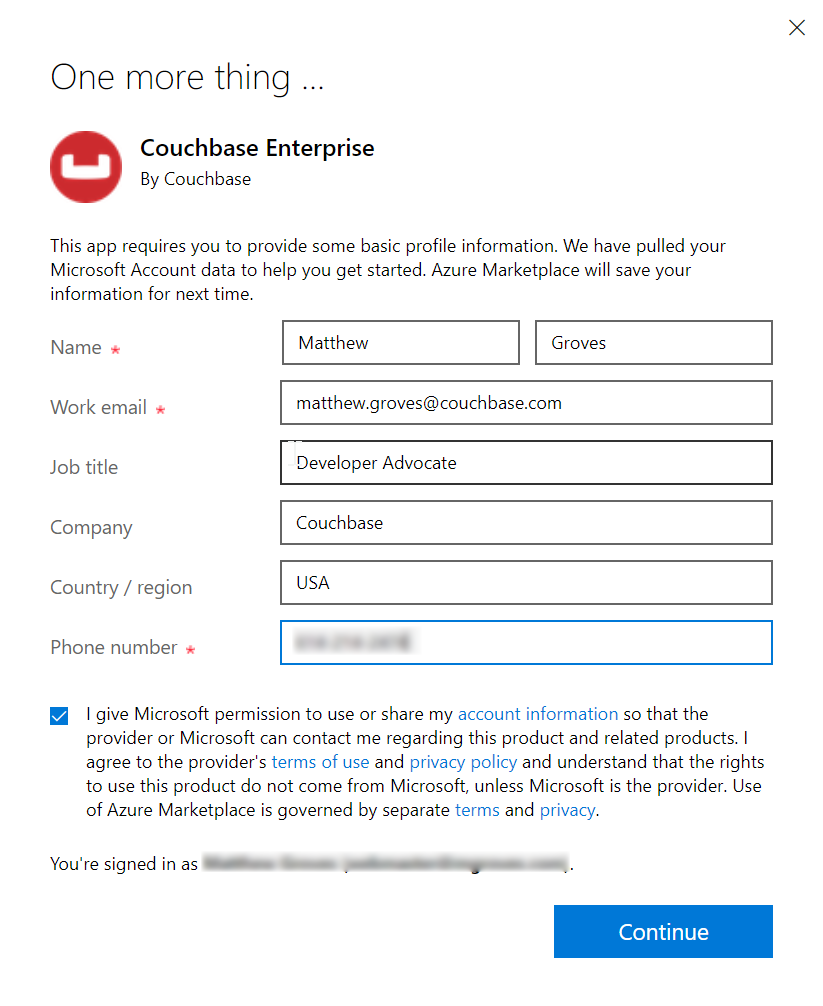
Step by Step Evaluation Labs
We’ve prepared 4 step-by-step labs that you can follow to start evaluating Couchbase Server.
The test drive deployment is a fully functional Couchbase Server Enterprise cluster with all features enabled. The only limit you have is time.
Summary
Couchbase is proud to partner with Microsoft to make this test drive available to you.
If you are interested in learning more about Couchbase on Azure, please check out these other blog posts:
If you have any questions, comments, or suggestions, please leave a comment, email me matthew.groves@couchbase.com, or tweet me @mgroves on Twitter.
