{
  "type": "fulltext-index",
  "name": "hotels",
  "sourceType": "couchbase",
  "sourceName": "travel-sample",

// ... snip ...

}Posts tagged with 'c'
For April, I'm doing something a little different. All four guests in April are family members!
Subscribe now!
Here's what's coming in April:
- Nathan Groves on Retro Gaming and Twitch streaming
- Kevin Groves discusses the movie Pirates of Silicon Valley and history of personal computing
- Ron Groves discusses the development of the EZRep product, the technology and decisions behind it
- Ali Groves discusses diet and nutrition technology: fitness trackers, diet tracking, apps, and tells me what a "macro" is
Subscribe now with your podcatcher of choice!
Want to be on the next episode? You can! All you need is the willingness to talk about something technical.
This is a repost that originally appeared on the Couchbase Blog: Hyper-V: How to run Ubuntu (or any Linux) on Windows.
I recently needed to install a Linux distro (Ubuntu being my favorite) in Hyper-V on Windows 10. I needed to do this because some internal builds of Couchbase were temporarily broken on Windows, but I still needed to use the latest builds. I’d never used Hyper-V to do this before, but it wasn’t that difficult. And the best part is that it comes with Windows: I don’t have to install VirtualBox or VMWare or anything like that.
Download Ubuntu
There are lots of great Linux distros out there, and Couchbase Server can be run on a variety of them. However, Ubuntu Desktop is my go-to.
The first thing I did was to download an Ubuntu Desktop ISO. I know that Couchbase support for Ubuntu 16 is coming, but for now I want to stick to Ubuntu 14. So, I downloaded an ISO of 14.04.5 (aka Trusty Tahr).
Make sure Hyper-V is enabled
Check to make sure that you have Hyper-V enabled on Windows.
First, open Control Panel. Next, go to Programs. Then, click "Turn Windows features on or off". Finally, locate Hyper-V and click the checkbox (if it isn’t already checked).
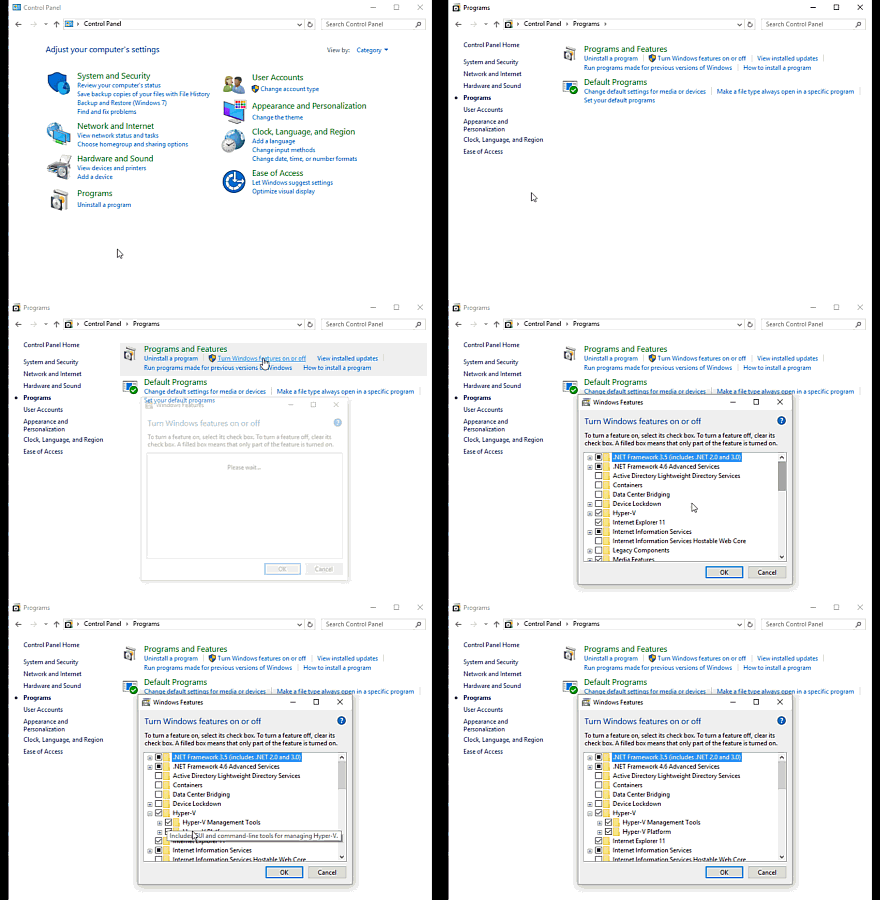
You may also need to enable virtualization in the BIOS settings on your computer. The computer I’m using has it turned on by default. I wish I could give you instructions on how to do this, but it’s going to vary based on your BIOS.
Create a Hyper-V Virtual Switch
When connecting the virtual machine to a network, you’ll need to select a virtual switch. If you haven’t done this before, you’ll need to create one.
First, click "Virtual Switch Manager", then select "External". Click "Create Virtual Switch". Finally, give the switch a name. (You also need to choose an external network; in my case I only have one). Hit "Apply".
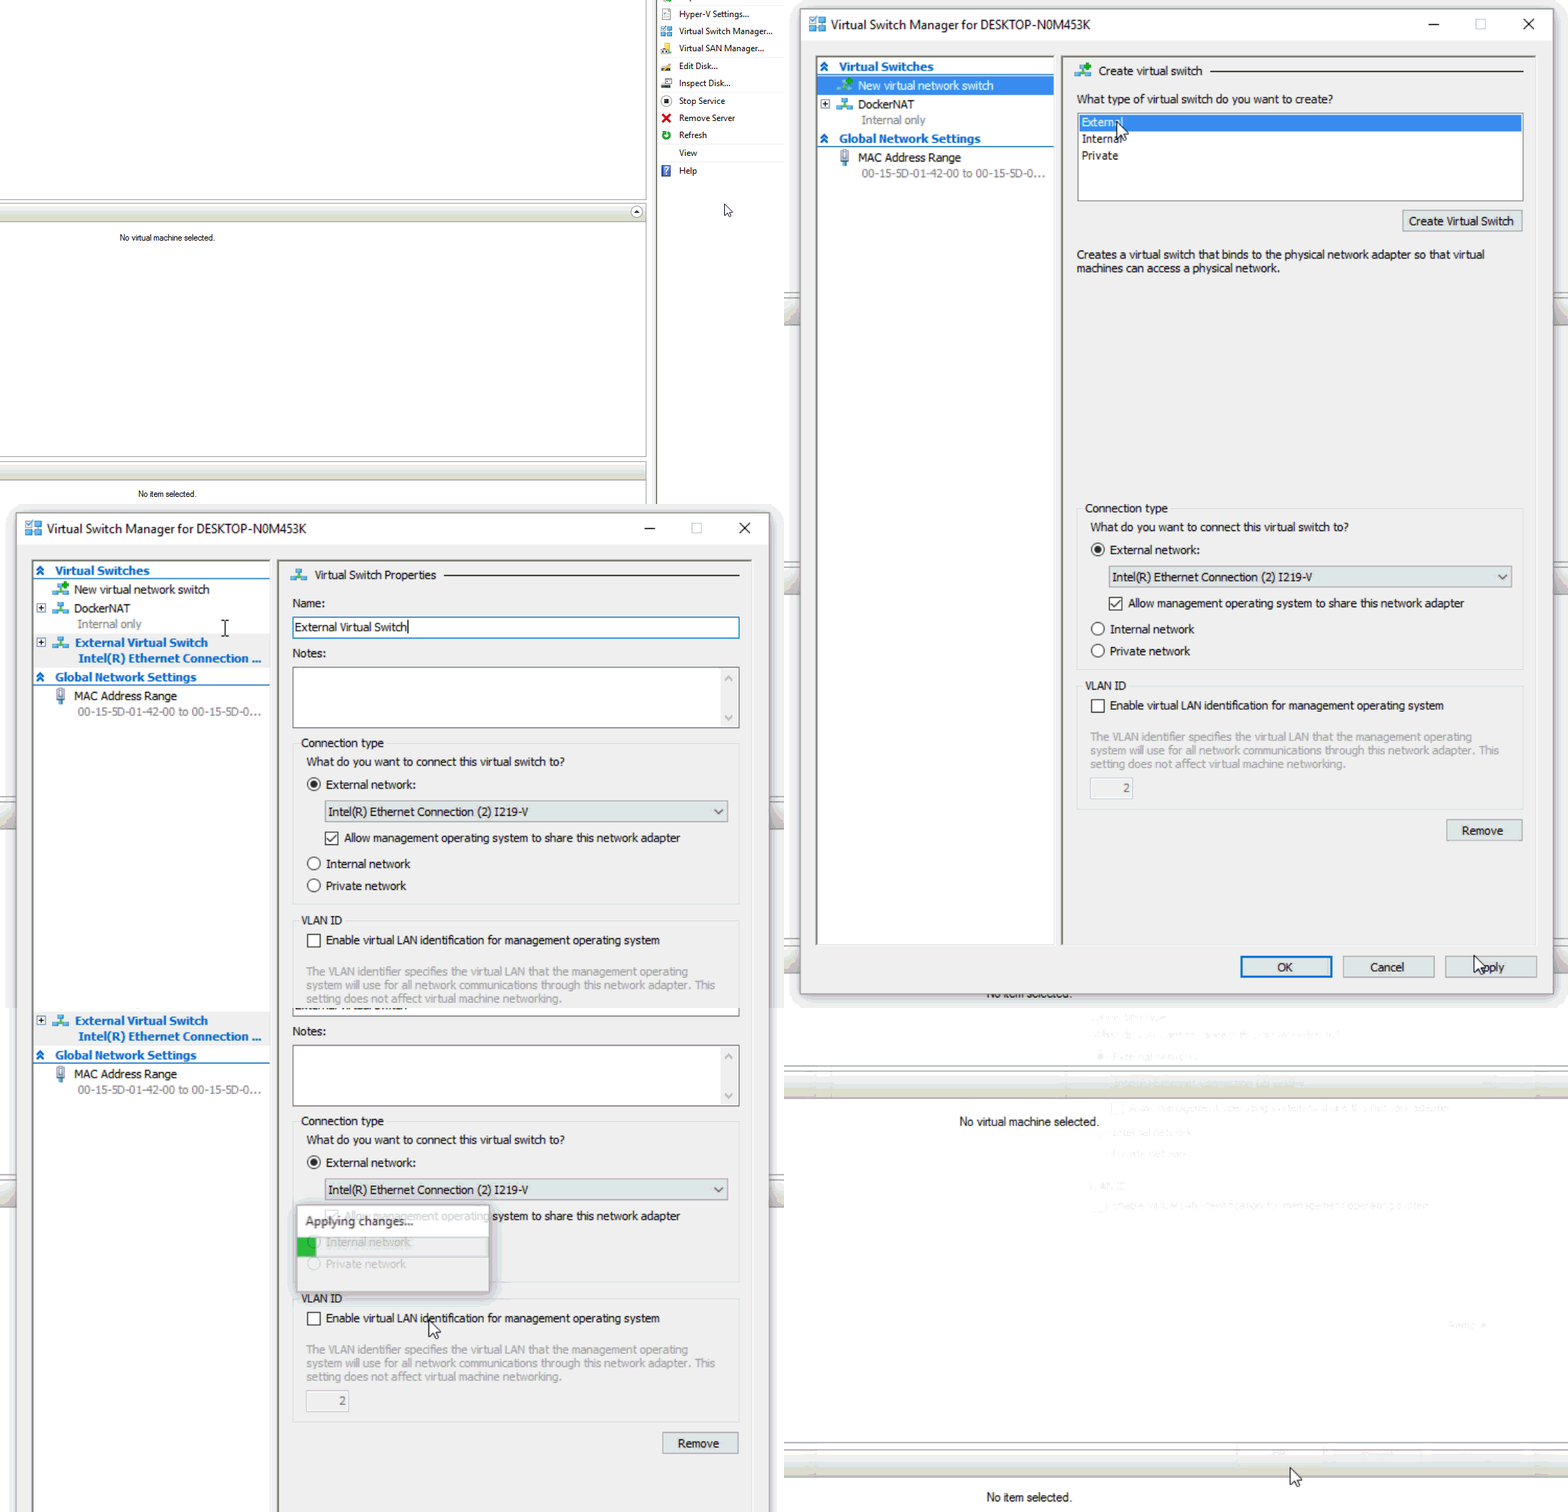
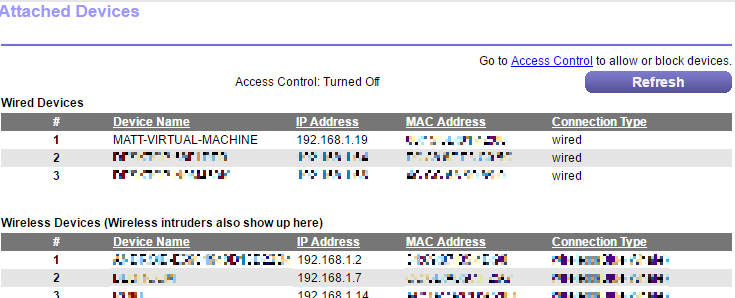
I wanted my machine to be connected to my home network, so I chose External. If you use External, it will connect to your network as a separate machine. After I create the machine (in the next section) it will appear on my router as it’s own machine:
Create a new Hyper-V Virtual Machine
Now you’re ready to create the virtual machine that will be running Ubuntu.
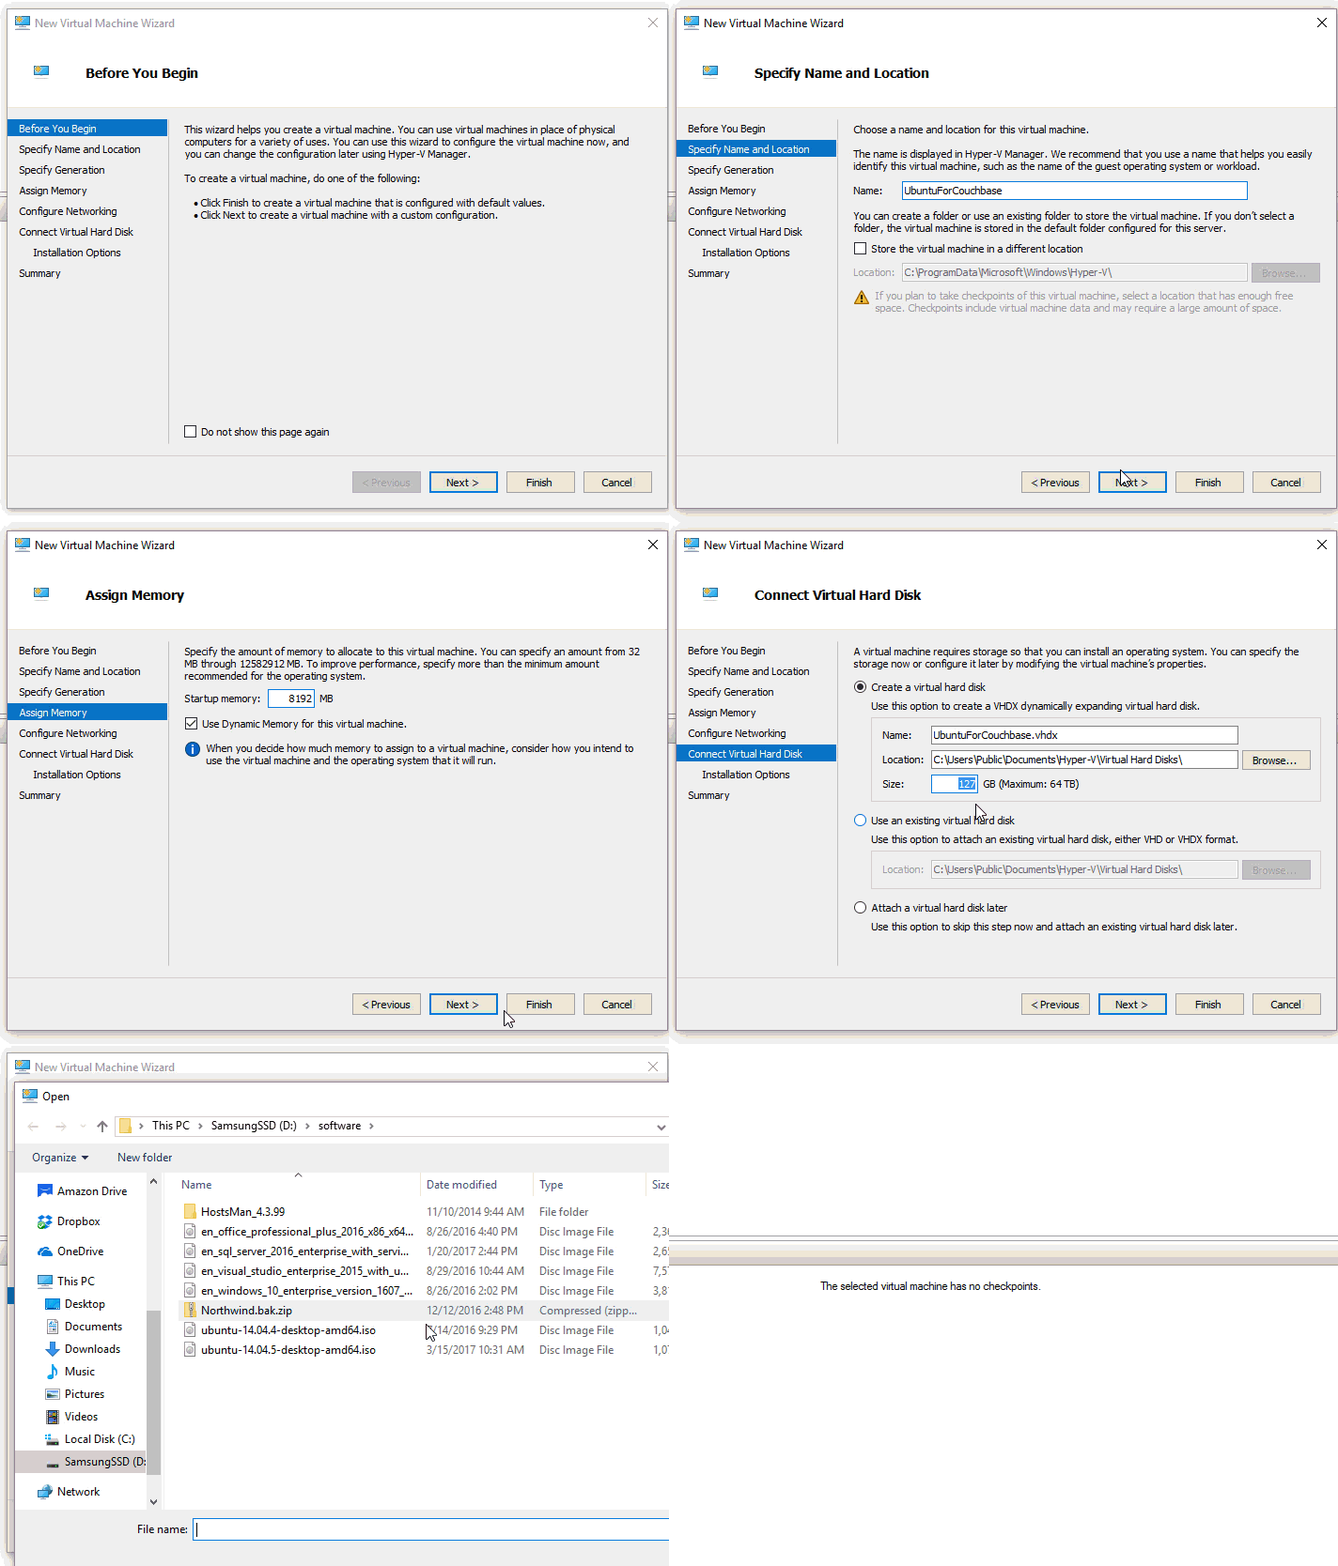
First, open the Hyper-V Manager from the Start menu. Then, click "New" and then "Virtual Machine". This will start a wizard.
First, give your machine a name (like "UbuntuForCouchbase"). Optionally, you can choose where to store this machine, or use the default directory.
Next, you must choose Generation 1 or Generation 2. I used Generation 1, but Ubuntu 14+ should work on Generation 2 as well.
After that, specify how much memory to allocate to the machine. I have a lot of RAM on my desktop, so I gave it 8192mb.
Next, select the switch that was created in the previous section.
Then, setup the virtual hard disk to your liking. You can choose the location and size of the disk. I don’t need very much, so I went with 60gb.
Finally, you need to select an operating system. I’ll choose "Install an operating system from a bootable CD/DVD-ROM", and then "Image file", and find the Ubuntu ISO that I downloaded.
Click "Next", view the summary, and click "Finish".
Start the machine and install Couchbase
Now that you’ve created a machine, you must start it. Right-click on the machine and select "Start" (or there’s a "Start" button in the actions menu to the right).
This starts the machine, but you can’t actually see the machine yet. You have to "Connect" to the machine to see what it’s doing. Right-click and select "Connect" (or again, there’s a "Connect" button in the actions menu to the right).
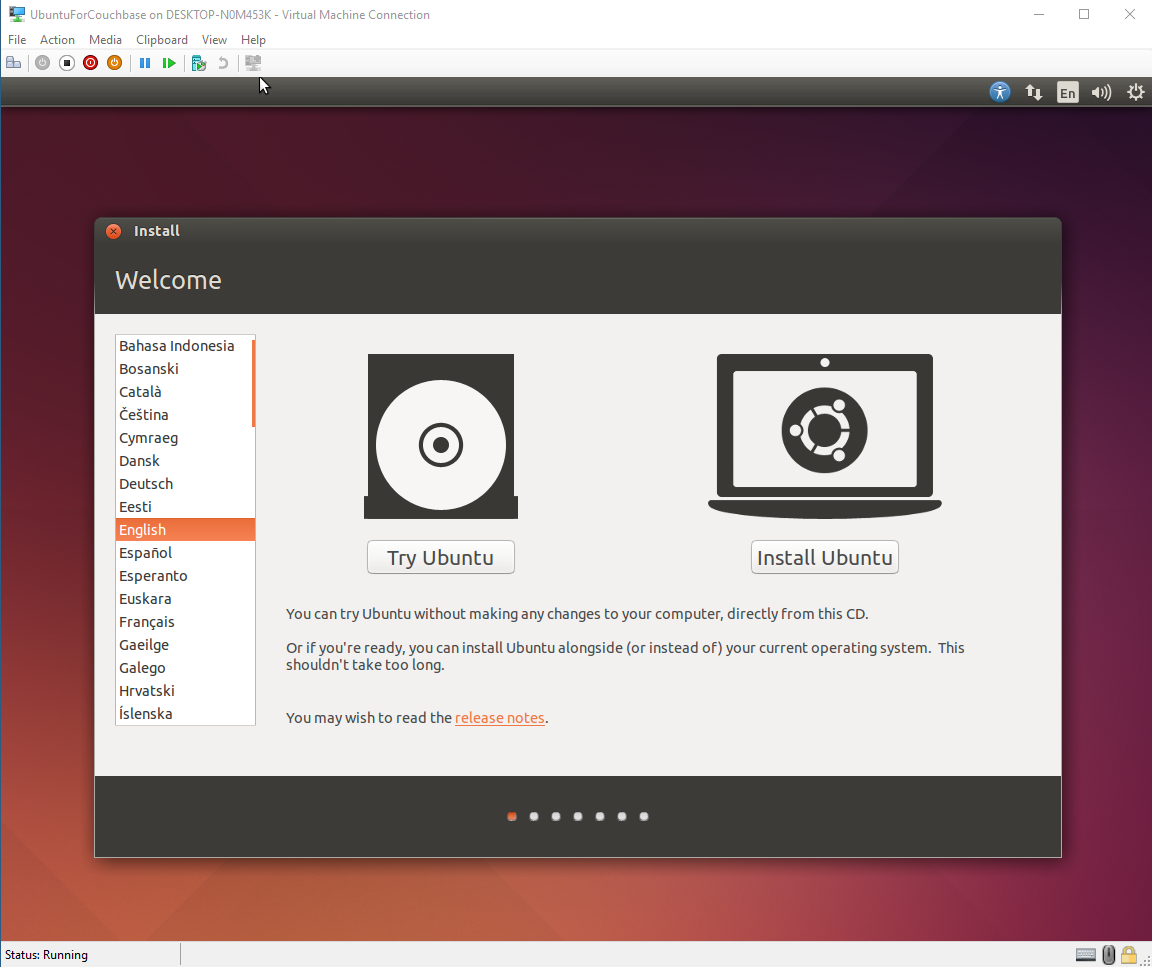
I won’t go through the installation process, since Ubuntu’s installation is pretty easy and self-explanatory (and well-documented).
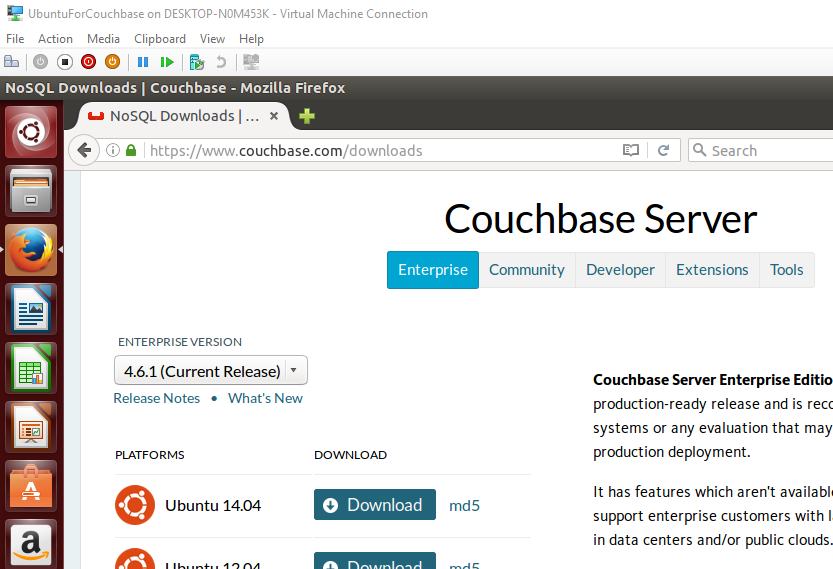
At the end of the Ubuntu installation, installing Couchbase Server is also pretty easy and self-explanatory. Just go to the Couchbase downloads page and select the Ubuntu 14 version of Couchbase.
Summary
I normally use the Windows version of Couchbase, but sometimes I need to use Ubuntu (or other Linux distros). Hyper-V on Windows is a convenient way for me to spin up virtual machines.
If you have any questions about Couchbase, please ask away in the Couchbase Forums or check out the Couchbase Developer Portal.
You can also contact me at Twitter @mgroves.
Bill Wagner is writing .NET Core documentation.
Show Notes:
- Books: Effective C# series by Bill Wagner
- New in C# 7 - Tuples
- New in C# 7 - Pattern Matching
- Non-nullable types for C# are under consideration, you can learn more by checking out the issues list on Github
- Null References: The Billion Dollar Mistake by Tony Hoare
- Places to learn about C#: Pluralsight, Lynda, Corsaira, Code Project, C# Corner, Xamarin Tutorials, Xamarin Workbooks
- Essential C# books by Mark Michaelis and Eric Lipper
- Humanitarian Toolbox
Want to be on the next episode? You can! All you need is the willingness to talk about something technical.
Theme music is "Crosscutting Concerns" by The Dirty Truckers, check out their music on Amazon or iTunes.
This is a repost that originally appeared on the Couchbase Blog: Authentication and Authorization with RBAC.
In March’s developer build, you can start to see some major changes to authentication and authorization within Role Based Access Control (RBAC) coming to Couchbase Server. These changes are a work in progress: the developer build is essentially a nightly build that gets released to the public. But there’s some good stuff in RBAC that’s worth getting excited about!
Go download the March 5.0.0 developer release of Couchbase Server today. Make sure to click the "Developer" tab to get the developer build (DB), and check it out. You still have time to give us some feedback before the official release.
Keep in mind that I’m writing this blog post on early builds, and some things may change in minor ways by the time you get the release, and some things may still be buggy.
Authentication and Authorization
Just a quick reminder of the difference between authentication and authorization:
-
Authentication is the process of identifying that a user is who they say they are.
-
Authorization is the process of making sure the user has permission to do what they are trying to do.
If you’ve used Couchbase before, you’re familiar with the login to what we sometimes call the "Admin Web Console".
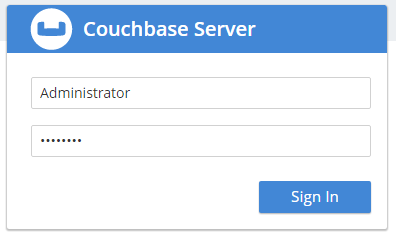
However, the Web Console is really not just for admins, it’s for developers too. But until now, you didn’t really have a lot of control built-in to Couchbase about who can log in and (more importantly) what they’re allowed to do.
So, I’d like to introduce you to Couchbase’s new first-class user feature.
Users
There’s still a full administrator user. This is the login that you create when you first install Couchbase. This is the user who is unrestricted, and can do anything, including creating new users. So, for instance, a full administrator can see the "Security" link in the navigation, while other users can’t.
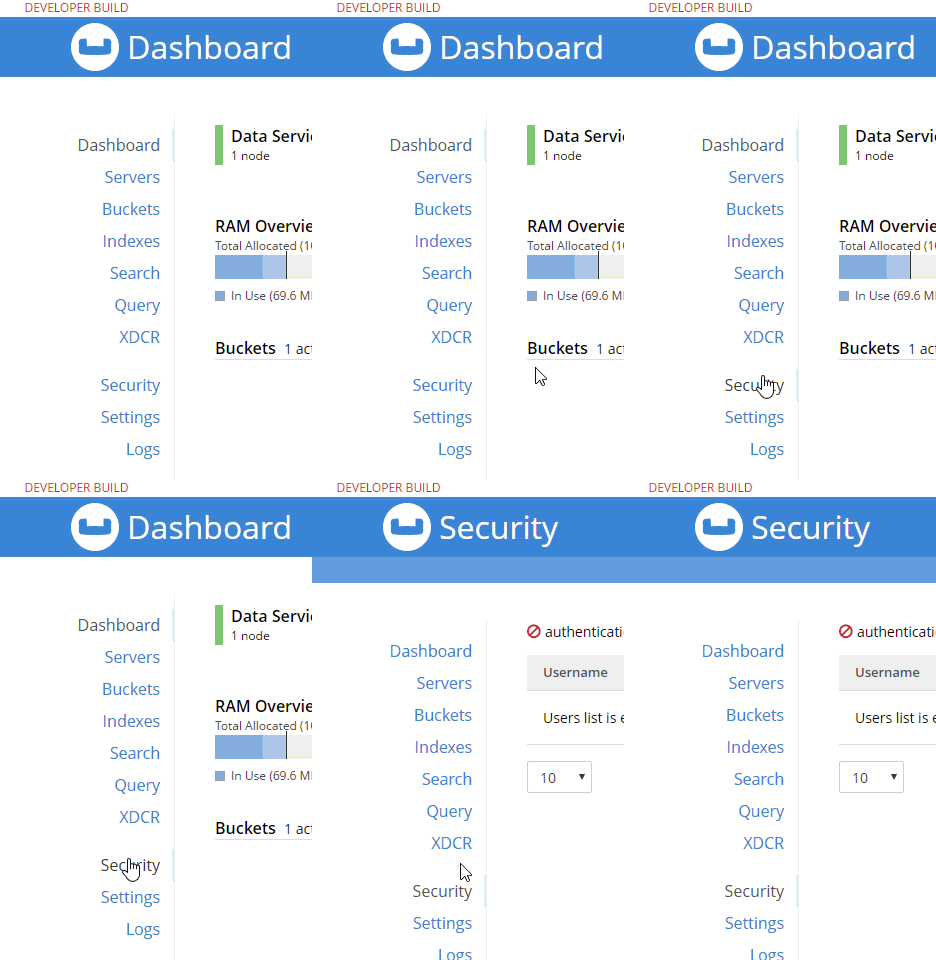
Now, once on this security page, you can add, edit, and delete users.
A user can identify a person, but it can also identify some service or process. For instance, if you’re writing an ASP.NET application, you may want to create a user with a limited set of permissions called "web-service". Therefore, the credentials for that "user" would not be for a person, but for an ASP.NET application.
Next, try adding a new Couchbase user by clicking "+ Add User". I’m going to create a user called "fts_admin", with a name of "Full Text Search Admin", a password, and a single role: FTS Admin of the travel-sample bucket (FTS = Full Text Search).
Adding a new User
Here’s an animation of adding that user:
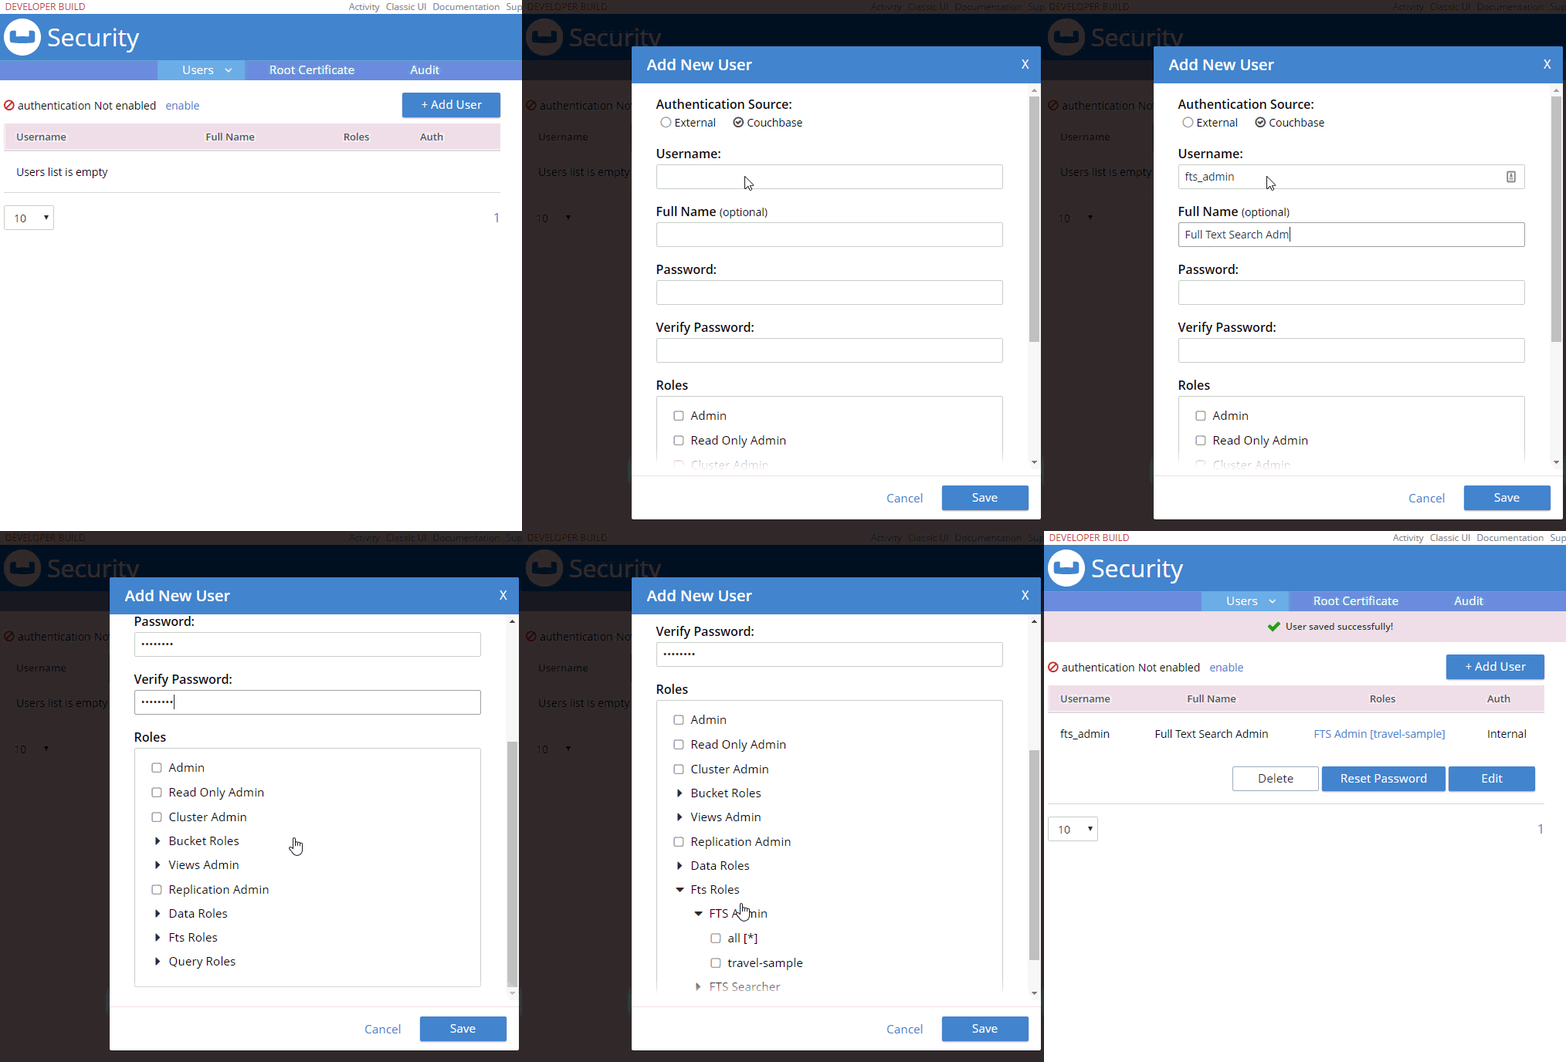
Some notes about the above animation:
-
I selected "Couchbase" instead of "External". External is meant for LDAP integration. Note that "Couchbase" (internal authentication) will likely become the default in future releases.
-
FTS Admin gives the user permission to do everything with Full Text Searches: create, modify, delete, and execute them.
-
I granted FTS Admin only for the travel-sample bucket. If I selected "all", that would grant permission to all buckets, even ones created in the future.
-
Users with the FTS Searcher role only have access to execute searches, not modify or create them.
More on the difference between FTS Admin and FTS Searcher later.
Logging in as a new user
Now that this user is created, I can login as fts_admin. This user’s authentication is handled within Couchbase.
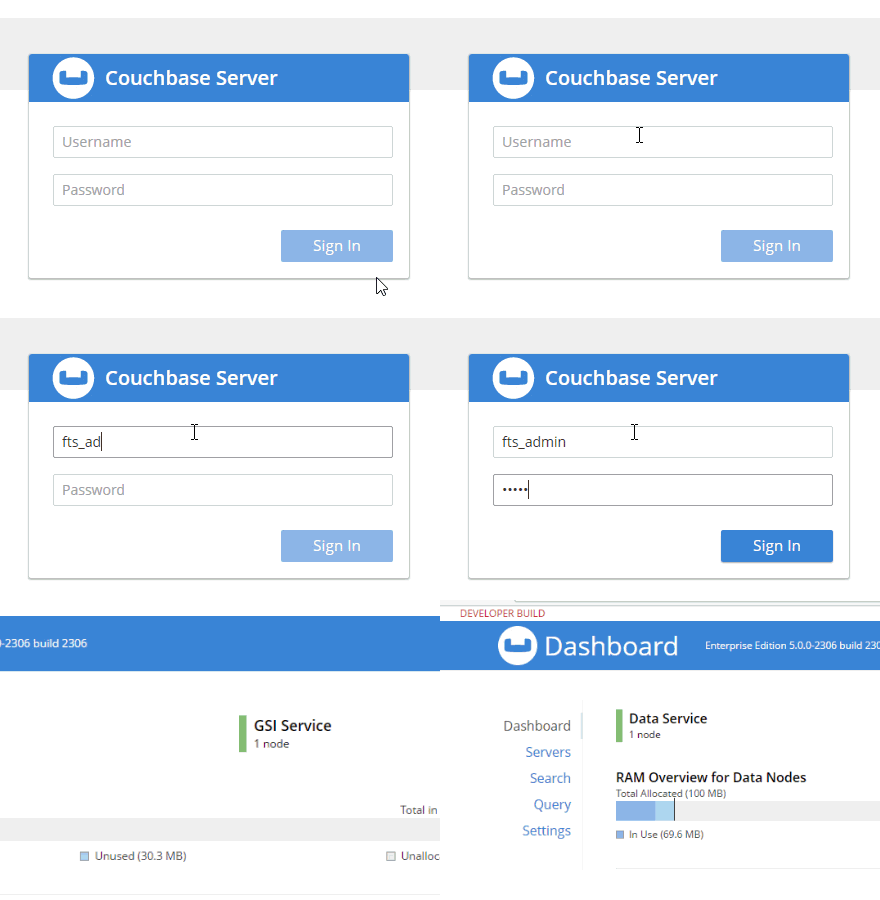
First, in the above animation, note that the fts_admin user has a much more limited set of options compared to the full admin user.
Next, it’s worth pointing out that users can reset their password:

Creating an FTS index
Since I’ve already created an fts_admin user with the FTS Admin role, I’ll create another user called fts_searcher that only has the FTS Searcher role for the travel-sample bucket.

Using the REST API for FTS
I’m going to use the REST API to demonstrate that these users are limited by the roles I’ve given them. If you need a refresher on the REST API, you can refer to the documentation of the Full Text Search API. Also note that I’m using the REST API because there are some bugs in the UI as I’m writing this.
Create an FTS index
To create an index with the REST API, I need to make a PUT request to the /api/index/<indexname> endpoint.
-
First, I’ll create an index for the 'hotel' type in the travel-sample bucket, so I’ll PUT to
/api/index/hotels -
Also, credentials can be put in the URL to use basic authentication
-
Furthermore, the REST endpoints are available on port 8094
Finally, the URL for the PUT request should look something like this:
The body of the PUT is a big JSON object. Below is part of it. You can find the full version on GitHub to try for yourself.
Normally, you can create this via the UI instead of having to create JSON by hand. I’m not going to go into FTS in much detail in this post, because my goal is to demonstrate the new authentication and authorization features, not FTS itself.
Trying to create an index without authorization
Notice that I’m using fts_searcher as the user. I know that fts_searcher shouldn’t have permission to create indexes, so I would expect a 403. And that’s just what I get.
{
  "message": "Forbidden. User needs one of the following permissions",
  "permissions": [
    "cluster.bucket[travel-sample].fts!write"
  ]
}
So, while the authentication worked, that user doesn’t have the necessary authorization.
Creating an index with authorization
I’ll try again with fts_admin:
And assuming an index named 'hotels' doesn’t already exist, you’ll get a 200, and this in the body of response:
{
  "status": "ok"
}
Using the FTS index
Next, let’s use the REST API to search the index for the word 'breakfast'.
First, make a POST to the /api/index/hotels/query endpoint, again with the proper credentials and port number.
or
Both users should be able to execute a search using that index.
Next, in the body of the POST should be a simple JSON object. Again, you don’t normally have to create this by hand — your SDK of choice or the Web Console UI can do this for you.
{
  "explain": true,
  "fields": [
    "*"
  ],
  "highlight": {},
  "query": {
    "query": "breakfast"
  }
}
Finally, the result of this search request will be a large JSON response. Look within the "hits" sub-document for "fragments" to verify that the search worked. Here’s a snippet of my search for "breakfast". Again, the full result is on Github.
// ... snip ...

        "reviews.content": [
          "… to watch TV. <mark>Breakfast</mark> was served every morning along with a copy of the Times-Picayune. I took my <mark>breakfast</mark> downstairs in the patio, the coffee was very good. The continental <mark>breakfast</mark> is nothing to…"
        ]
      },

// ... snip ...
This is a preview, expect some bugs!
There are some bugs and some incomplete features.
-
I’ve shown FTS roles here on purpose. This is because the other roles are not yet fully formed. Please try them out, let us know what you think, but remember they are not in their final form. FTS is closest to ready.
-
I’ve seen some issues when logging in as a non-admin user causes the web console to behave badly. Because of this, I showed the REST example above instead of relying on the UI.
-
Finally, there might be other bugs that we don’t know about yet. Please let us know! You can file an issue in our JIRA system at issues.couchbase.com or submit a question on the Couchbase Forums. Or, contact me with a description of the issue. I would be happy to help you or submit the bug for you (my Couchbase handlers send me a cake pop when I submit a good bug).
If you have questions, the best way to contact me is either Twitter @mgroves or email me matthew.groves@couchbase.com.
Ryan Lanciaux is using Griddle to show grids with React.
Show Notes:
- Griddle (GriddleGriddle) is on Github
- Ryan mentioned some tools for JS development: CodePen and JS Bin
- Ryan also mentioned Jeff Barczewski's Redux Logic project.
Want to be on the next episode? You can! All you need is the willingness to talk about something technical.
Theme music is "Crosscutting Concerns" by The Dirty Truckers, check out their music on Amazon or iTunes.


