public class ShoppingCart
{
    public string UserName { get; set; }
    public DateTime LastUpdated { get; set; }
    public List<Item> Items { get; set; }
    public decimal Total
    {
        get { return Items.Sum(i => i.Price); }
    }
}Posts tagged with 'NUnit'
This is a repost that originally appeared on the Couchbase Blog: Visual Studio Live Unit Testing: New to Visual Studio 2017.
Visual Studio 2017 was just officially released. It comes with a lot of new, great stuff, but one of my favorite new features is built-in Visual Studio Live Unit Testing (available in Visual Studio 2017 Enterprise, not yet available for .NET Core projects).
In this post, I’m going to show you how Visual Studio Live Unit Testing works, as well as some thoughts around using unit tests vs integration tests. You can follow along by getting the full source code for this Live Unit Testing example on GitHub.
Visual Studio Live Unit Testing with NUnit
NUnit is perhaps the most popular testing tool for C#/.NET developers. Visual Studio Live Unit Testing can also work with xUnit and MSTest, but for this post I’m going to just cover NUnit.
To use NUnit, you add it with NuGet, just as normal. To use Visual Studio Live Testing, you’ll also need to add the NUnit Test Adapter (Install-Package NUnite3TestAdapter).
Next, start Live Testing by clicking Test → Live Unit Testing → Start.

Writing a Unit Test
We’ll need some unit tests to demonstrate. We could just do Assert.That(1, Is.EqualTo(1)), but where’s the fun in that? Let’s create a shopping cart class.
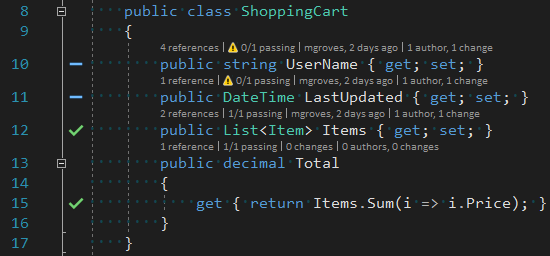
This shopping cart has a couple properties, and a collection of items in it. Notice the Total property. Astute readers may already notice some problems with it, but let’s start with a single, simple unit test to make sure it calculates a total.
[Test]
public void ShoppingCart_Total_Should_Sum_Up_the_Item_Prices()
{
    // arrange: create shopping cart with 2 items and figure out the expected total
    var item1 = new Item { Name = "Large Pepperoni Pizza", Price = 14.99M };
    var item2 = new Item { Name = "Cheese Sticks", Price = 4.99M };
    var expectedTotal = item1.Price + item2.Price;
    var cart = new ShoppingCart { Items = new List<Item> { item1, item2 } };

    // act: user the Total method on ShoppingCart
    var actualTotal = cart.Total;

    // assert: totals should match
    Assert.That(actualTotal, Is.EqualTo(expectedTotal));
}
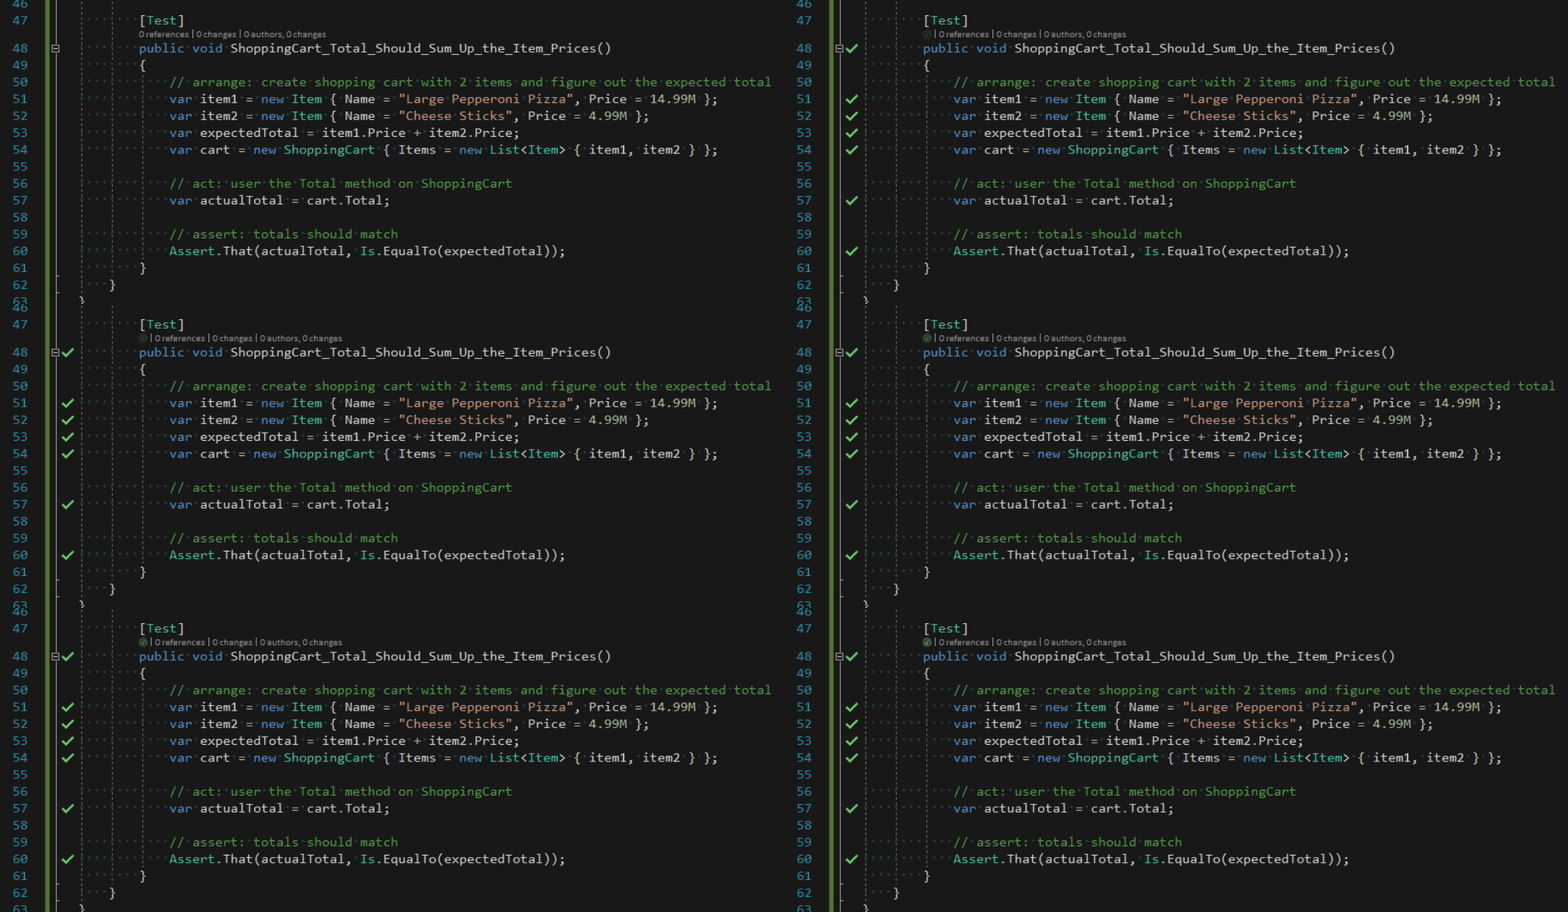
If Live Unit Testing is turned on, then the test is being automatically run in the background by Visual Studio. You should see some green checkmarks appear.

The green checkmarks will also appear wherever the code that is under test is covered.

With Visual Studio Live Unit Testing, you don’t have to stop to run the tests. As you are coding, the tests will run, and give you immediate feedback on whether your code is making tests fail (or whether you’ve written enough code to make your test pass).
Most of all, this will encourage you to write more tests.
What are Integration Tests?
When writing unit tests, you are meant to test a small piece of code on its own. For code that interacts with some external service (a web service, a database, a file system, etc), you often mock those pieces out, so that you can focus on the unit.
You may also write integration tests with NUnit. Integration tests that are meant to go beyond testing a single unit of code, and test that systems work together. Let’s write a method that writes a record to Couchbase Server. This test will use a real database, therefore we can consider it an integration test.
public void SaveShoppingCart(ShoppingCart cart)
{
    _bucket.Insert(new Document<ShoppingCart>
    {
        Id = Guid.NewGuid().ToString(),
        Content = cart
    });
}
This method should save a shopping cart to a document in Couchbase Server. To make sure it’s working, we can write an NUnit test.
[Test]
public void Repo_Can_Save_a_New_Shopping_Cart_to_Database()
{
    // arrange: create a shopping cart
    var cart = new ShoppingCart
    {
        UserName = "Matthew " + Guid.NewGuid().ToString(),
        LastUpdated = DateTime.Now
    };

    // act: save shopping cart to database
    Repo.SaveShoppingCart(cart);

    // assert: check that the cart was saved
    var cartBackOut = Repo.GetCartByUserName(cart.UserName);
    Assert.That(cartBackOut, Is.Not.Null);
    Assert.That(cartBackOut.UserName, Is.EqualTo(cart.UserName));
}
Note: To keep this post simple, I omitted some of the repository details, and test setup. You can view all of this in the GitHub repository.
Integration Tests with Visual Studio Live Unit Testing
Visual Studio Live Unit Testing will happily run this unit test. You may not want these types of tests to be running in the background automatically because:
-
If you don’t have Couchbase Server installed, or a bucket created and indexed, then they will fail.
-
If you have a lot of tests that rely on external components, they could slow down the tests (reading/writing documents in Couchbase is very fast, but setting up a
Clusterobject for each test or test fixture is not). -
These tests could add a lot of unnecessary junk test data to your database.
Excluding Integration Tests from Visual Studio Live Unit Testing
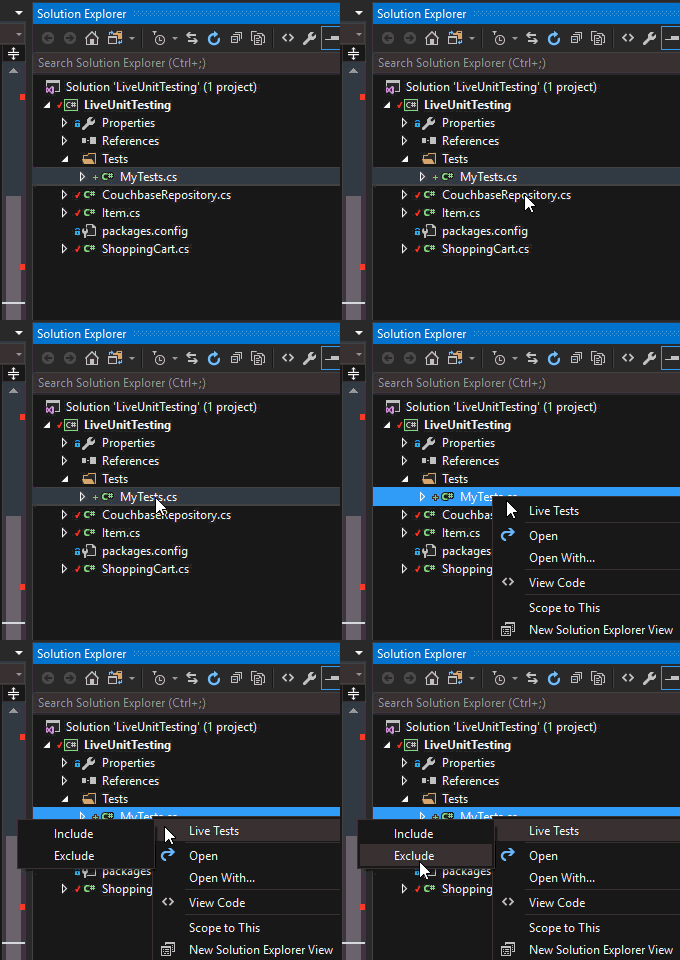
To exclude tests from Live Unit Testing, you can simply right-click on the test file and select "Exclude" from the context menu.

After this, none of the tests in that file will be executed by Live Unit Testing. You can also exclude an entire project. So, if you organize unit tests and integration tests into separate projects, then you are all set.
If you don’t organize them into separate projects, then this process could be a bit tedious. Further, the Include/Exclude information is a local setting that can’t (as of the time I’m writing this, and to the best of my knowledge) be committed to source control.
So, after asking about Live Testing exclusion on StackOverflow, I created an attribute that you can place on tests to exclude them from Live Testing.
public class IgnoreForLiveTesting : Attribute, ITestAction
{
    readonly string _ignoreReason;

    public IgnoreForLiveTesting(string ignoreReason = null)
    {
        _ignoreReason = ignoreReason;
    }

    public ActionTargets Targets { get; set; }

    public void AfterTest(ITest test) { }

    public void BeforeTest(ITest test)
    {
        var isLiveTesting = AppDomain.CurrentDomain.GetAssemblies()
            .Any(a => a.GetName().Name == "Microsoft.CodeAnalysis.LiveUnitTesting.Runtime");
        if (isLiveTesting)
            Assert.Ignore(_ignoreReason ?? "Ignoring this test");
    }
}
This attribute implements the ITestAction interface (which is kinda like Aspect-Oriented Programming/AOP for NUnit, but that’s a topic for a whole other blog post). It will check to see if it’s being run by a LiveUnitTesting process. If it is, it instructs NUnit to ignore the test.
Furthermore, I added an optional ignoreReason to the constructor, so that you can add a helpful note to other people on your team to explain why this test should not be run with Live Unit Testing. You can use it on an integration test like so:
[IgnoreForLiveTesting("Integration Test")]Summary
I’m not terribly pleased with this method, as it’s NUnit specific, and it’s not quite exactly what I was hoping for with Visual Studio Live Unit Testing. But right now I think "the juice is worth the squeeze". Live Unit Testing is such a great feature for writing code, especially Test-Driven Development (TDD), that it’s worth it to have to write and use a special NUnit attribute.
By all means, if you know of a better way to achieve this, I want to know about it. Please leave a comment below or ping me on Twitter @mgroves.
If you have questions about the Couchbase code you saw in this post, I’d be happy to help. Or, you can check out the responsive and knowledgeable community on the Couchbase .NET SDK forum. If you want to learn more about Couchbase, check out the Couchbase Developer Portal.
