if(Session["IsLoggedIn"] = false)
Session["Username"] = "matt";Posts tagged with 'distributed'
Gino Ferrand is building a company for distributed teams. This episode is not sponsored! Want to be a sponsor? You can contact me or check out my sponsorship gig on Fiverr
Show Notes:
-
Book: Remote by DHH and Jason Fried
Want to be on the next episode? You can! All you need is the willingness to talk about something technical.
This is a repost that originally appeared on the Couchbase Blog: Distributed session with ASP.NET Core and Couchbase.
Distributed session is a way for you to store your session state outside of your ASP.NET Core application. Using Couchbase to store session state can help you when you need to scale your web site, especially if you don’t want to use sticky sessions.
You can follow along with the code samples I’ve created, available on GitHub.
Note that Couchbase.Extensions.Session is a beta release at the time of this writing.
Review of session
Session state is simply a way to store data for a particular user. Typically, a token is stored in a user cookie, and that token acts as a key to some set of data on the server side.
If you’re familiar with ASP.NET or ASP Classic, this is done using Session. All the cookie work is done behind the scenes, so you simply use Session as a dictionary to store and retrieve whatever data you want.
By default, in ASP.NET and ASP Classic, this information is stored in memory, as part of the web application process.
In ASP.NET Core, you can also opt-in to this by configuring session with AddSession.
First, in Startup.cs, in the Configure function, tell ASP.NET Core to use session:
app.UseSession();Then, in the ConfigureServices function, use AddSession to add a session provider service.
services.AddDistributedMemoryCache();
services.AddSession();
(This will use the default session settings, see the ASP.NET Core documentation for more information).
Why distributed session?
However, if you are scaling out your web application with multiple web servers, you’ll have to make some decisions about session. If you continue to use in-process session, then you must configure sticky sessions (the first web server that a user hits is the one they will "stick" with for subsequent requests). This has some potential downsides (see this thread on ServerFault and this article on Microsoft’s TechNet magazine).
If you don’t want to use sticky sessions, then you can’t use the in-process session option. You’ll instead need to use a distributed session. There are a lot of options for where to put session data, but Couchbase’s memory-first architecture and flexible scaling capabilities make it a good choice.
Using distributed session in ASP.NET Core
Before you start writing code, you’ll need a Couchbase Server cluster running with a bucket (I named mine "sessionstore"). You’ll also need to create a user with Data Reader and Data Writer permission on the bucket (I also called my user "sessionstore" just to keep things simple).
Adding Couchbase.Extensions.Session
Now, open up your ASP.NET Core application in Visual Studio. (I created a new ASP.NET Core MVC app, which you can find on GitHub). Next, with NuGet, install the Couchbase.Extensions.Session library:
-
Use the NuGet UI (see below), or
-
Install-Package Couchbase.Extensions.Session -Version 1.0.0-beta2with the Package manager, or -
dotnet add package Couchbase.Extensions.Session --version 1.0.0-beta2with the dotnet command line

Configuring Couchbase
To configure the session provider, you’ll be writing some code that looks familiar if you’ve been following along in this Couchbase.Extensions series.
The ConfigureServices method in Startup.cs is where you’ll be adding configuration code.
First, use AddCouchbase, which is done with the Dependency Injection extension.
After that, setup the distributed cache for Couchbase with AddDistributedCouchbaseCache, which I covered in a blog post on distributed caching.
services.AddCouchbase(opt =>
{
    opt.Servers = new List<Uri> { new Uri("http://localhost:8091") };
});

services.AddDistributedCouchbaseCache("sessionstore", "password", opt => { });
Finally, configure Couchbase as a session store with AddCouchbaseSession.
services.AddCouchbaseSession(opt =>
{
    opt.CookieName = ".MyApp.Cookie";
    opt.IdleTimeout = new TimeSpan(0, 0, 20, 0);
});
You can configure the idle timeout (how long until the session expires after not being used), the cookie name, and more, if you need to. In the above example, I set the timeout to 20 minutes and the cookie name to ".MyApp.Cookie".
Writing to a distributed session
To access Session data, you can use HttpContext.Session.
First, I want to write something to session. In an About controller action, I used the SetObject method:
public IActionResult About()
{
    HttpContext.Session.SetObject("sessionkey", new
    {
        Name = "Matt",
        Twitter = "@mgroves",
        Guid = DateTime.Now
    });

    ViewData["Message"] = "I put a value in your session. Click 'Contact' to see it.";

    return View();
}
From this point on, whenever you click to view the "About" page, a new value will be stored in session with the key "sessionkey". If you switch over to Couchbase Console, you can see the data being stored.
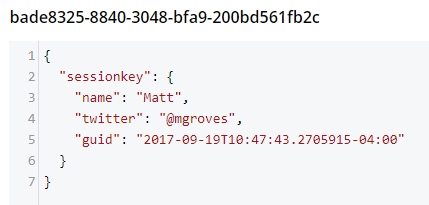
Note that a user’s session is represented by a single document. So, if I were to insert another session value (as below), that value would be stored in the same document.
HttpContext.Session.SetObject("sessionkey2", new
{
    Address = "123 Main St",
    City = "Lancaster",
    State = "OH"
});
The resultant document would look like:
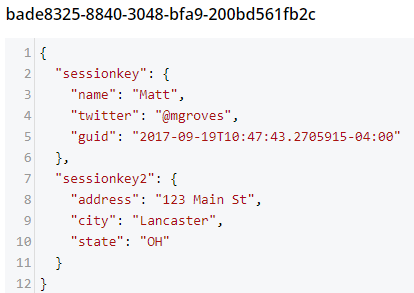
You should be careful not to go crazy with the amount of data you put into session, because Couchbase documents are limited to 20mb.
Reading from a distributed session
To get a value out of session, you can use GetObject and supply the session key. In the sample code, I did this in the Contact action:
public IActionResult Contact()
{
    ViewData["Message"] = HttpContext.Session.GetObject<dynamic>("sessionkey");

    return View();
}
After you visit the "About" page at least once, go to the "Contact" page. You should see the session object printed out to the page.
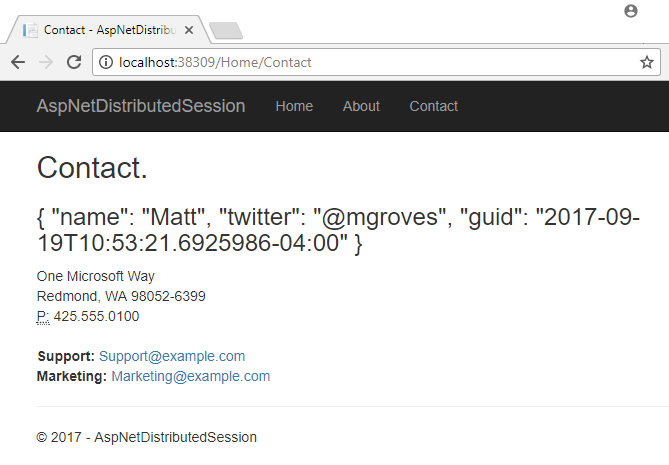
That’s pretty much it. There are some other relatively self-evident methods available on Session. They are also outlined in the ASP.NET Core documentation.
One more thing: I named the cookie (".MyApp.Cookie"). You can view this cookie in the browser of your choice. In Chrome, use Ctrl+Shift+I and navigate to the "Application" tab. You will see the cookie and its value.
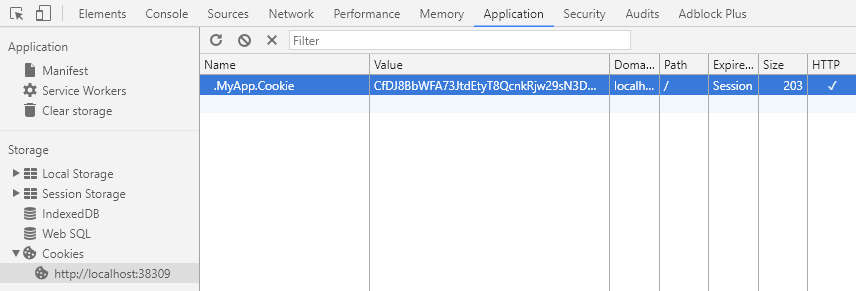
You generally don’t need to know this detail in your day-to-day as an ASP.NET Core developer, but it’s good to know how things work just in case.
Summary
The distributed session extension for Couchbase is another tool in your box for helping to scale your ASP.NET Core applications. These handy .NET extensions help to demonstrate how Couchbase is the engagement database platform that you need.
If you have questions or comments on Couchbase Extensions, make sure to check out the GitHub repository or the Couchbase .NET SDK forums.
And please reach out to me with questions on all things .NET and Couchbase by leaving a comment below or finding me on Twitter @mgroves.
This is a repost that originally appeared on the Couchbase Blog: Distributed caching with ASP.NET Core and Couchbase.
Distributed caching can help to improve performance of an ASP.NET Core application. This is especially true for an ASP.NET application that’s deployed to a server farm or scalable cloud environment. Using Couchbase Server for caching is one of the many features that make it an ideal choice for your engagement database needs.
In this blog post, I’ll show you how to use the Couchbase.Extensions.Caching middleware plugin to easily add distributed caching capabilities to your application.
You can follow along with the sample code I wrote for this post on GitHub.
Please note that Couchbase.Extensions.Caching is currently in a beta2 release (as I’m writing this blog post), so some things may change.
Basic setup of Couchbase
First, you’ll need a Couchbase Server cluster running (you can install it on-premise, or with Docker, or even in Azure if you’d like).
Next, you’ll need to create a bucket in Couchbase where cached data will be stored. I called mine "cachebucket". You may want to take advantage of the new ephemeral bucket feature in Couchbase Server 5.0 for caching, but it is not required.
If you are using Couchbase Server 5.0, you’ll also need to create a user with permissions (Data Writer and Data Reader) on that bucket. To keep things simple, create a user that has the same name as the bucket (e.g. "cachebucket").
Distributed Caching with Couchbase.Extensions
The Couchbase.Extensions (GitHub) project aims to make working with Couchbase Server and .NET Core simpler. Caching is just one of these extensions.
You can add it to your ASP.NET Core project with NuGet, via Package Manager: Install-Package Couchbase.Extensions.Caching -Version 1.0.0-beta2, or with the NuGet UI, or you can use the .NET command line: dotnet add package Couchbase.Extensions.Caching --version 1.0.0-beta2.

Once you’ve added this to your project, you’ll need to make a couple minor changes to your Startup class in Startup.cs.
First, in ConfigureServices, add a couple namespaces:
using Couchbase.Extensions.Caching;
using Couchbase.Extensions.DependencyInjection;
This will make the Caching namespace available, and specifically the AddDistributedCouchbaseCache extension method for IServiceCollection. Next, call that extension method from within the ConfigureServices method.
The other namespace in there, DependencyInjection, is necessary to inject Couchbase functionality. In this case, it’s going to be used only by the Caching extension. But you can use it for other purposes too, which I will cover in a future blog post.
But for now, it’s just needed for the AddCouchbase extension method on IServiceCollection.
Finally, put them both together, and your ConfigureServices method should look like this:
public void ConfigureServices(IServiceCollection services)
{
    services.AddMvc();

    services.AddCouchbase(opt =>
    {
        opt.Servers = new List<Uri>
        {
            new Uri("http://localhost:8091")
        };
    });

    services.AddDistributedCouchbaseCache("cachebucket", "password", opt => { });
}
Using distributed caching
Now that you have distributed caching setup with Couchbase in your ASP.NET Core project, you can use IDistributedCache elsewhere in your project.
Injecting IDistributedCache
A simple example would be to use it directly in a controller. It can be injected into constructors as you need it:
public class HomeController : Controller
{
    private readonly IDistributedCache _cache;

    public HomeController(IDistributedCache cache)
    {
        _cache = cache;
    }

    // ... snip ...

}
Caching strings
You can use the GetString and SetString methods to retrieve/set a string value in the cache.
// cache/retrieve from cache
// a string, stored under key "CachedString1"
var message = _cache.GetString("CachedString1");
if (message == null)
{
    message = DateTime.Now + " " + Path.GetRandomFileName();
    _cache.SetString("CachedString1", message);
}
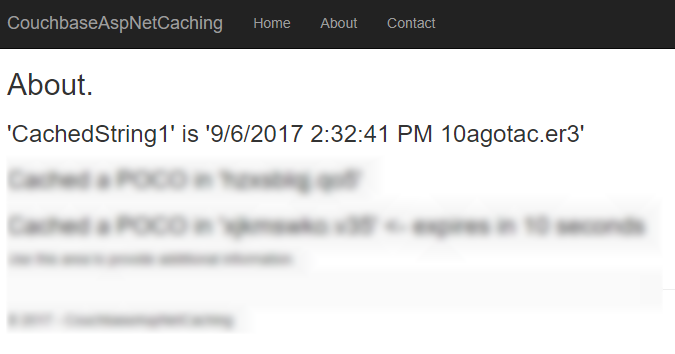
ViewData["Message"] = "'CachedString1' is '" + message + "'";
This would appear in the "cachebucket" bucket as an encoded binary value (not JSON).

In the sample code, I simply print out the ViewData["Message"] in the Razor view. It should look something like this:
Caching objects
You can also use Set<> and Get<> methods to save and retrieve objects in the cache. I created a very simple POCO (Plain Old CLR Object) to demonstrate:
public class MyPoco
{
    public string Name { get; set; }
    public int ShoeSize { get; set; }
    public decimal Price { get; set; }
}
Next, in the sample, I generate a random string to use as a cache key, and a random generated instance of MyPoco. First, I store them in the cache using the Set<> method:
var pocoKey = Path.GetRandomFileName();
_cache.Set(pocoKey, MyPoco.Generate(), null);
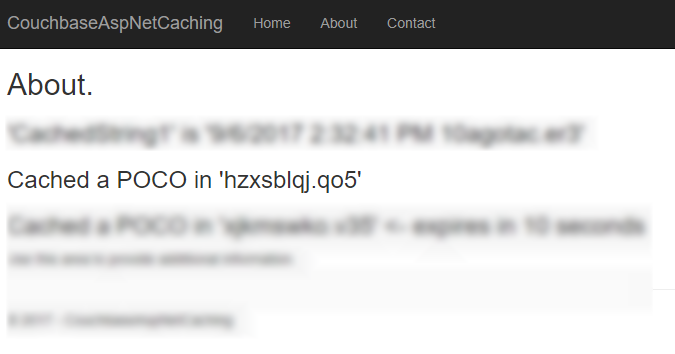
ViewData["Message2"] = "Cached a POCO in '" + pocoKey + "'";
Then, I print out the key to the Razor view:
Next, I can use this key to look up the value in Couchbase:

Also, notice that it’s been serialized to JSON. This not only means that you can read it, but you can also query it with N1QL (if you need to).
Distributed caching with expiration
If you want the values in the cache to expire after a certain period of time, you can specify that with DistributedCacheEntryOptions (only SlidingExpiration is supported at this time).
var anotherPocoKey = Path.GetRandomFileName();
_cache.Set(anotherPocoKey, MyPoco.Generate(), new DistributedCacheEntryOptions
{
    SlidingExpiration = new TimeSpan(0, 0, 10) // 10 seconds
});
ViewData["Message3"] = "Cached a POCO in '" + anotherPocoKey + "'";
In the sample project, I’ve also set this to print out to Razor.
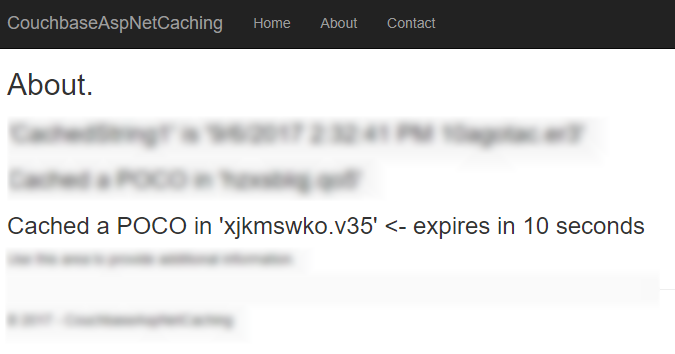
If you view that document (before the 10 seconds runs out) in Couchbase Console, you’ll see that it has an expiration value in its metadata. Here’s an example:
{
  "id": "xjkmswko.v35",
  "rev": "1-14e1d9998125000059b0404502000001",
  "expiration": 1504723013,
  "flags": 33554433
}
After 10 seconds, that document will be gone from the bucket, and you’ll see an error "not found (Document does not exist)".
Tearing down distributed caching
Finally, don’t forget to cleanup the resources used by the Couchbase .NET SDK for distributed caching. One easy way to do this is with the ApplicationStopped event. You can wire this up in Startup:
appLifetime.ApplicationStopped.Register(() =>
{
    app.ApplicationServices.GetRequiredService<ICouchbaseLifetimeService>().Close();
});
Note that you will have to add IApplicationLifetime appLifetime as a parameter to the Configure method in Startup if you haven’t already.
Summary
Using Couchbase Server for distributed caching in your ASP.NET Core application is a great way to improve performance and scalability in your application. These kind of "engagement" use cases are what Couchbase Server excels at. To see customers that are using Couchbase Server for caching, check out the Couchbase Customers page.
If you have questions or comments about the Couchbase.Extensions.Caching project, make sure to check out the GitHub repository or the Couchbase .NET SDK forums.
As always, you can reach me by leaving a comment below or finding me on Twitter @mgroves.

